Difference between revisions of "Fuel Tank, Removal and Refurbishment"
m (Added a note regarding tightening fuel pump ring studs being tightened, I'm aware of a few leaks caused by not doing this, myself included!) |
|||
| (5 intermediate revisions by one other user not shown) | |||
| Line 1: | Line 1: | ||
| − | This page describes the removal of a tank and pump from | + | This page describes the removal of a tank and pump from a RHD S1 Elise. It will be similar if not identical for most of the Elise based cars |
| Line 79: | Line 79: | ||
[[File:2000 (16).JPG|thumb|none|Rubber Hoses at Tank End]] | [[File:2000 (16).JPG|thumb|none|Rubber Hoses at Tank End]] | ||
| − | [[File:2000 (10).JPG|thumb|none|Rubber Hoses at Fuel Inlet End | + | [[File:2000 (10).JPG|thumb|none|Rubber Hoses at Fuel Inlet End]] |
| Line 89: | Line 89: | ||
Although you can see these connectors, they are a complete pain in the ar*e to undo. | Although you can see these connectors, they are a complete pain in the ar*e to undo. | ||
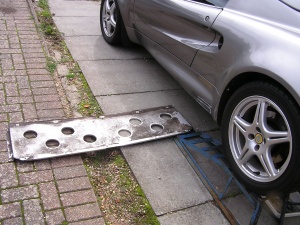
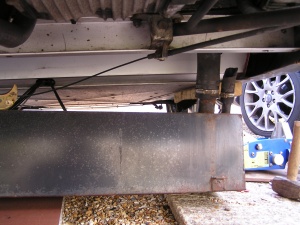
| − | Better to drop the tank a cm or two ( | + | Better to drop the tank a cm or two (section 16) then go back and undo the connectors. You will have more space to get your hand through the inspection hatch without lacerating your fingers and wrist. |
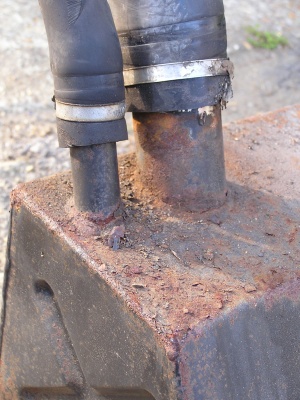
The electrical cable has plenty of slack but be careful you do not drop the tank too far as the fuel pipe have limited amount of movement and the pipes are only semi flexible | The electrical cable has plenty of slack but be careful you do not drop the tank too far as the fuel pipe have limited amount of movement and the pipes are only semi flexible | ||
| Line 103: | Line 103: | ||
[[File:2000 (33).JPG|thumb|none|Fuel Pipe Connectors]] | [[File:2000 (33).JPG|thumb|none|Fuel Pipe Connectors]] | ||
| − | 15. With the rubber filler pipes off and the inspection hatch open, support the centre of the tank with a trolley jack and a block of wood. Undo the 4 fixing bolts and remove. | + | 15. With the rubber filler pipes off and the inspection hatch open, support the centre of the tank with a trolley jack and a block of wood. Undo the 4 tank fixing bolts and remove. |
| Line 136: | Line 136: | ||
[[File:2000 (34).JPG|thumb|none|Pump Removed]] | [[File:2000 (34).JPG|thumb|none|Pump Removed]] | ||
| + | Whenever the fuel pump is removed, ensure the 8 bolts are tightened up from inside the tank before refitting to avoid leaks. | ||
| Line 152: | Line 153: | ||
[[File:3000 (26).JPG|none|thumb|Tank Painted]] | [[File:3000 (26).JPG|none|thumb|Tank Painted]] | ||
| − | 24. If refurbishing the original tank, it is worth unbolting the lower ring, cleaning and resealing. | + | 24. If refurbishing the original tank, it is worth unbolting the lower ring, cleaning and resealing. The holes in this lower ring are threaded and it is held onto the tank by the 8 bolts, the heads are inside the tank. The lower ring is sealed to the tank with a layer of non setting fuel resistant liquid gasket eg blue hylomar. |
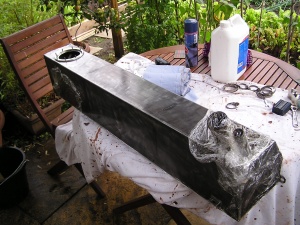
| Line 181: | Line 182: | ||
30. Think about a pump replacement if your car is high mileage. Spitfire Engineering, Eliseshop and Eliseparts all have upgraded or redesigned pumps. | 30. Think about a pump replacement if your car is high mileage. Spitfire Engineering, Eliseshop and Eliseparts all have upgraded or redesigned pumps. | ||
| + | |||
31. Buy new stainless steel jubilee clips for all the rubber hose connections because being a Lotus, you know you’ll be back in here again one day…… :-( | 31. Buy new stainless steel jubilee clips for all the rubber hose connections because being a Lotus, you know you’ll be back in here again one day…… :-( | ||
Latest revision as of 22:45, 23 February 2019
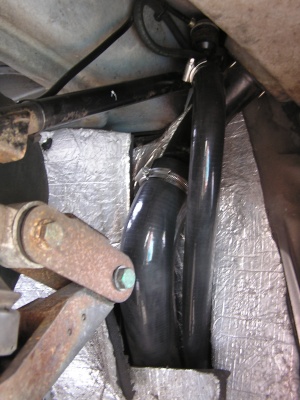
This page describes the removal of a tank and pump from a RHD S1 Elise. It will be similar if not identical for most of the Elise based cars
((CLICK ON IMAGES TO ENLARGE ))
Word Of Warning before you start
- A near empty/empty fuel tank is perhaps more dangerous than a full tank as there is a far greater amount of fumes contained within therefore a greater chance of explosion. Even when empty of fuel, do not expose the tank to any source of heat, flame or spark ***
Method
1. Ensure you have the minimum amount of petrol as possible in the tank before tackling the work. The tank is not particularly heavy with only a few litres in it but would be a much harder to manoeuvre with half a tank or more sloshing about.
Perform fuel pressure release procedure as follows:-
Remove the fuel pump fuse
Start car and allow engine to run until it dies (if non-runner crank engine for 60 seconds on starter)
2. Lift the rear of the car up high as possible as the tank has to come downward and then sideway to remove from the chassis. The tank fuel filler pipes add a good bit to the height plus the tank will be sitting on a trolley jack to assist lowering/raising.
I ran the car up on ramps, then jacked up and supported on stands the drivers side, then removed the ramp to gain access into the drivers wheel arch.
3. Remove the drivers side rear wheel and arch liner.
4. Remove the undertray and diffuser panel.
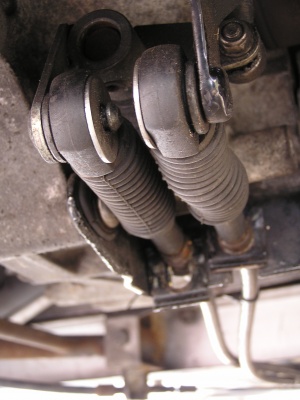
5. Undo the gear selection cables at the gear selector ends and cable clips.
Note the direction of travel of the cables under the car and which part of the gear mechanism each cable end connects to.
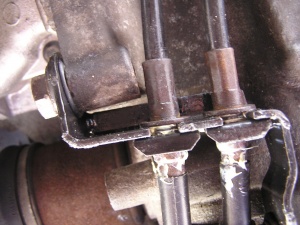
6. Undo the gear cable fixing on the shear panel
7. Undo the accelerator cable at the throttle body.
Note the position of the lock nut on the threaded end in relation to the throttle cable bracket to avoid having to adjust the throttle position cable on reassembly
Note the route of the throttle cable down the induction side of the engine for repositioning on reassembly
8. Undo the throttle cable clips where it is secured to the shear panel
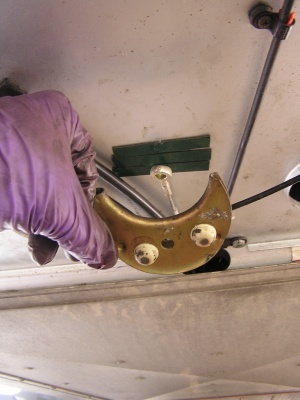
9. Split the front part of the handbrake cable at the "horseshoe" bracket by removing the “R” clip and pushing the clevis pin out.
There is no need to remove the rear part of the handbrake cable as the shear panel can be slid past it
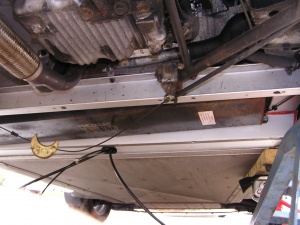
10. Push both the throttle cable, both gear cables and the handbrake cable forwards under the car to allow the tank to drop down.
11. Undo the bolts and remove the shear panel under the tank. The panel will slide out sideways missing the handbrake cable mounting points with bit of wiggling
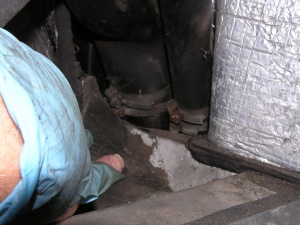
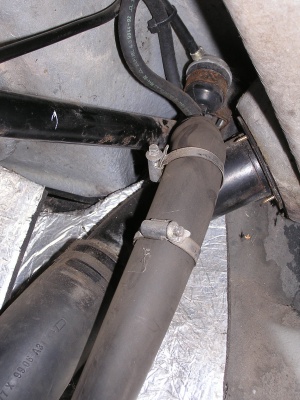
12. Removing the old rubber filler hoses from the tank filler pipes is virtually impossible if they have not been off before. They are likely to be bonded to the tank filler pipes. It is common for the rubber hoses to have perished.
NOW SAVE YOURSELF HOURS AND HOURS of grief and cut off the old rubber pipes and replace with new. (Member "lotusandy" was selling very good quality flouro lined silicon replacements. They literally slide on. He may have some left.)
Others have used boiling water on the old pipes to soften them (See Previous Instructions at end of this page), but once you see the room you have to work in the wheel arch, Personally, I wouldn't bother.
Remove the rubber filler hoses completely ie undo at the fuel filler neck as well, and only refit them after the tank has been replaced. If you just undo the lower connections to the tank, you will struggle refitting the tank and reconnecting the hoses. Space and location make it very difficult.
13. Remove the passenger seat (It is possible to undo just the seat belt mount at the winding mechanism end, and leave the other end attached to the seat, then lift the seat out and to the side of the car. The belt end attached to the seat is a fine pitched bolt and is easy to cross thread when refitting)
14. Remove the inspection hatch behind the tank to access the top of the pump/ fuel and electrical connectors.
Although you can see these connectors, they are a complete pain in the ar*e to undo.
Better to drop the tank a cm or two (section 16) then go back and undo the connectors. You will have more space to get your hand through the inspection hatch without lacerating your fingers and wrist.
The electrical cable has plenty of slack but be careful you do not drop the tank too far as the fuel pipe have limited amount of movement and the pipes are only semi flexible
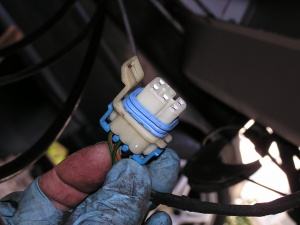
The electrical connector has one tang that requires lifting and then it will come off the pump.
The fuel connectors require to be compressed at two points at the same time while pulling the pipe off the pump. Not a great photo but you can see the connectors in this
Rotate the fuel connectors a few degrees each way to break the seal before you try to pull them off.
15. With the rubber filler pipes off and the inspection hatch open, support the centre of the tank with a trolley jack and a block of wood. Undo the 4 tank fixing bolts and remove.
16. Drop the tank a few cm's at the pump end (you'll probably find the filler pipe end will jam slightly as the hole in the chassis for them to pass through is tight so the tank will naturally drop at the fuel pump end first).
Now go back into the car and undo the electrical and fuel connectors.
Note which fuel pipe comes off which pump output/input
17. Under the car again and continue to slowly drop the tank. You may have to go back into the wheel arch to help push the filler pipes down through the chassis hole.
18. When the tank is completely lowered, you can pull it sideways out from under the car. To avoid damaging paintwork, it can be slide out on a piece of cardboard/carpet etc
Pump Removal/Replacement
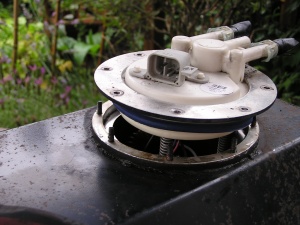
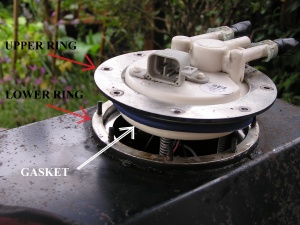
19. With the tank out, the fuel pump can be removed. The pump is held into the tank by an aluminium upper ring held down by 8 small nuts onto a lower ring with a gasket between
The pump is help in compression by this ring. There are 3 springs inside the pump attempting to push the top of the pump upwards.
20. Remove the 8 mounting nuts by undoing them a few turns at a time rather than each one individually to allow the pump to rise evenly. One of the nuts is located under the pump outlets and requires the use of an open ended spanner initially.
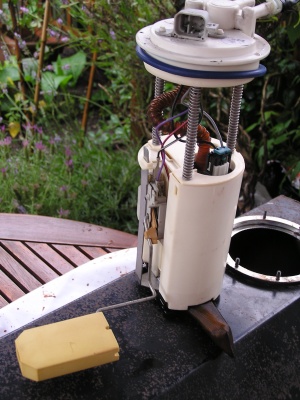
21. Once the ring has been unbolted, the pump may be simply lifted out.
I found that my old foam sealing gasket had expanded excessively. A new gasket is available from Lotus for a few £’s
Whenever the fuel pump is removed, ensure the 8 bolts are tightened up from inside the tank before refitting to avoid leaks.
Tank Refurbishment
22. The original tank is likely to have a lot of surface rust especially around the filler pipe area and the bottom corners.
23. If you intend to remove the rust using mechanical means (sandpaper, angle grinder, wire brush), it is advisable to fill the tank completely with water to expel any remaining petrol fumes. This will make the tank very heavy and unwieldy to manoeuvre but safe from explosion
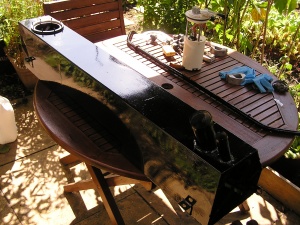
I used a combination of angle grinder with wire brush and Deox rust remover gel (cover in cling film will prevent it drying out) then prepared and painted with POR15 Metal Ready and paint
24. If refurbishing the original tank, it is worth unbolting the lower ring, cleaning and resealing. The holes in this lower ring are threaded and it is held onto the tank by the 8 bolts, the heads are inside the tank. The lower ring is sealed to the tank with a layer of non setting fuel resistant liquid gasket eg blue hylomar.
Refitting
Refit is virtually a reverse of the above procedure
25. Lift the tank on a trolley jack. Remember to reconnect the electrical and fuel pipes before raising completely into position.
26. Replace the 4 tank mounting bolts loosely. This will give you a bit of movement in the tank to aid fitting the rubber hoses to the tank filler pipes.
27. From within the wheel arch, fit the rubber hoses to the tank filler pipes and secure with jubilee clips, then back under the car and fully tighten the tank mounting bolts.
28. When refitting, the shear panel, ensure it is torqued up to the correct 24Nm. The panel is an integral part of the chassis support/stiffness.
Things to consider while the tank is out
29. Replace the brake pipes behind the tank with non corroding Copper/Nickel pipe (Kunifer etc). You will never have to worry about them again.
The brake pipes where they emerge from behind tank into the flow of road dirt and water in front of the rear wheels are the most common areas to rust through.
30. Think about a pump replacement if your car is high mileage. Spitfire Engineering, Eliseshop and Eliseparts all have upgraded or redesigned pumps.
31. Buy new stainless steel jubilee clips for all the rubber hose connections because being a Lotus, you know you’ll be back in here again one day…… :-(
PREVIOUS INSTRUCTIONS LISTED BELOW
Removing fuel tank
NOTE: This is best done when tank is empty or almost empty as otherwise tank will be heavy!
Perform fuel pressure release procedure as follows:-
- Remove fuel pump fuse
- Start car and allow engine to run until it dies (if non-runner crank engine for 60 seconds on starter)
Remove middle and rear undertrays
Get car as high as possible on axle stands (I jack one side using middle jacking point, then place stands at front and rear sub frame jacking points on one side, then do the same on the other side.
Release gear change cables from gearbox end
Release throttle cable from engine end
Remove r-clip from handbrake cable ‘horseshoe’ connector.
Remove front and rear bolts from sheer panel and remove exposing fuel tank
Remove off-side wheel
Remove off-side wheel arch liner
Pull back sound proofing on engine firewall to expose fuel filler and breather pipes
Loosen all jubilee clips holding pipes to tank
Pour 2 kettles of boiling water over rubber hoses so that they expand and become softer and then pull them off fuel tank connectors
Support fuel tank from underneath using jack(s) or something else suitable
At this point you can try to remove the pump connections as follows but my hands were far too big to make this possible! If you can’t just skip this step for now.
- Remove passenger seat
- Remove fuel pump access panel on shelf behind passenger seat
- Put hand through hole and disconnect fuel pipes by squeezing clips together and electrical connector by pulling tab on side a bit and pulling off
Undo the four fuel tank bolts
Slowly and carefully lower the tank whilst trying to feed the fuel pipes through the bulkhead a bit until you can get you hand up the side of the tank and release the fuel pipes and electrical connector as above
Then lower the tank and remove
Replacement is a reversal of removal but ensure electrical wires are not caught when you refit
