Difference between revisions of "How to Rebuild a Brembo Caliper"
| (16 intermediate revisions by 7 users not shown) | |||
| Line 1: | Line 1: | ||
Lotus Elise Rear Caliper Rebuild and Upgrade | Lotus Elise Rear Caliper Rebuild and Upgrade | ||
| + | |||
| + | This article originally contributed by 40mmBrakes ( http://40mmbrakes.auto.officelive.com/default.aspx ) | ||
| + | ===Pre-Warning=== | ||
| + | |||
| + | '''Before you start taking things apart, first ensure that your calipers are servicable.''' | ||
| + | First make sure that you can remove the tiny grub screw that you can see in this photo. It needs a 4.5mm allen key which is a fairly unusual size. An alternative may be to use an imperial 3/16" allen key, although this is often a very tight fit and corrosion inside the allen socket may make it difficult to seat fully. | ||
| + | |||
| + | [[Image:grubscrew.JPG]] | ||
| + | |||
| + | Unfortunately the grub screw sits deeply recesed in the boss of the caliper by 10-12mm. By the time your calipers reach an age where they would befefit from new seals, the thread in the boss has become so corroded that it's nigh-on impossible to remove the grub screw. | ||
| + | |||
| + | A no-harm solution is to fill the cavity with penetrating oil and come back tomorrow. The screw is in tight because the tapered end acts as a fluid seal; there is brake fluid on the opposite side. Once it breaks loose, it may not be that difficult to remove. | ||
| + | |||
| + | A brute force solution is to take an angle grinder to the boss and remove the excess material. Cut the boss flush with the top of the grub screw. The heat generated by this also helps to free up the screw. | ||
| + | |||
| + | The other part to check is the 13mm bolt that holds the handbrake arm to the caliper. Make sure that this loosens as it has a tendency to go soft and shear off. In any case you should not expect the internals of the caliper to support the torque needed to loosen the bolt! The small parts that are engaged with parking brake actuation are not strong enough to resist the torque of a stuck bolt. You should put the handbrake arm (only) in a vise and unscrew the bolt so that the resistance torque is only applied to the arm. | ||
| + | |||
| + | Bear in mind that it's a straightforward job to refurb the sliders but examine your calipers carefully before attempting to replace the piston seals. | ||
| + | |||
| + | ===Repair=== | ||
| + | |||
| + | |||
| + | The service manual claims the [[Brembo Caliper]]s fitted to the rear [[brakes]] of the Elise are not fully serviceable. | ||
| − | |||
These instructions were developed by disassembling and reassembling many calipers and are not perfect. | These instructions were developed by disassembling and reassembling many calipers and are not perfect. | ||
| − | The Lotus Elise rear caliper is | + | The Lotus Elise rear caliper is sometimes criticised as being too small. The rear caliper can be machined to accept a 38mm or even a 40mm piston and sleeve. |
| + | |||
| + | |||
| + | For the 38mm piston, you will need a Brembo 38mm seal, part number 05.5955.57 | ||
| + | |||
| + | |||
| + | For the 40mm piston, you will need a Brembo 40mm seal, part number 05.5955.58 | ||
| − | + | This conversion still allows the use of all the other standard size parts that come in the KC-83017 kit. | |
| Line 15: | Line 43: | ||
| − | |||
| − | |||
| − | |||
== Procedure == | == Procedure == | ||
| Line 24: | Line 49: | ||
[[Image:Brembo_Caliper_7.JPG]] | [[Image:Brembo_Caliper_7.JPG]] | ||
| − | Unscrew piston as far as it will go using either a windback tool or stout needle nose pliers, one tip in each hole. | + | Unscrew piston as far as it will go using either a windback tool or stout needle nose pliers, one tip in each hole. Push in and rotate counter clockwise. |
| Line 47: | Line 72: | ||
[[Image:Brembo_Caliper_11.JPG]] | [[Image:Brembo_Caliper_11.JPG]] | ||
| + | |||
| + | NB Only follow the following procedure if you have access to a new screw as 80% of the time they shear off & are not available to buy separately. You can get the whole assembly with the snap-ring out of the bore with some curved tools (eg. bend a screwdriver ) so it comes out as 1 piece. (Courtesy of Arno) | ||
Remove the dust boot. | Remove the dust boot. | ||
| − | With a | + | With a 4mm allen key, remove the screw. This screw has an O-ring around the head, so do not reach in and use pliers. It is also held in with thread lock glue, so it feels a little stuck before it comes loose. It may also drag the whole way out. Use the proper allen key, since the metal is soft and you’ll easily round the hole. |
| Line 68: | Line 95: | ||
Here’s what will fall out:- | Here’s what will fall out:- | ||
| + | |||
Ball bearing | Ball bearing | ||
| + | |||
Flat washer | Flat washer | ||
| + | |||
Wave washer | Wave washer | ||
| + | |||
Snap ring | Snap ring | ||
| Line 89: | Line 120: | ||
[[Image:Brembo_Caliper_17.JPG]] | [[Image:Brembo_Caliper_17.JPG]] | ||
| − | Unscrew the hex stop peg in the boss of the caliper. | + | Unscrew the hex stop peg in the boss of the caliper. You will need a 4.5mm allen key which is an uncommon size. |
| + | |||
| + | In case the grub screw/peg strips and you need to drill it out, the following diagram shows the sizes: | ||
| + | [[Image:Grubscrew-brembo.jpg]] | ||
| + | |||
| + | By drilling (or preferrably milling) out at 9.5mm the threads should be spared and after drilling through deep enough the tapered section should be cut free and can be re-used with a normal M10x1.00 grubscrew to re-seal the hole. The remains of the thread can be picked out and cleaned up. | ||
[[Image:Brembo_Caliper_18.JPG]] | [[Image:Brembo_Caliper_18.JPG]] | ||
| Line 104: | Line 140: | ||
Remove the ball bearing drive plate, the needle bearing, and the flat washer. | Remove the ball bearing drive plate, the needle bearing, and the flat washer. | ||
Remove the old piston seal. | Remove the old piston seal. | ||
| − | |||
| − | |||
=== Reassembly === | === Reassembly === | ||
| Line 119: | Line 153: | ||
[[Image:Brembo_Caliper_21.JPG]] | [[Image:Brembo_Caliper_21.JPG]] | ||
| − | The internal assembly will go back together in this order: | + | The internal assembly will go back together in this order:- |
| + | |||
Wave washer | Wave washer | ||
| + | |||
Flat washer | Flat washer | ||
| + | |||
Ball bearing | Ball bearing | ||
| − | Cone screw | + | |
| + | Cone screw | ||
Use some thread lock on the O-ringed screw on reassembly. | Use some thread lock on the O-ringed screw on reassembly. | ||
| Line 171: | Line 209: | ||
In any case, the piston will seem to be very low, lower than the dust boot wrinkles, before the snap ring engages. If the snap ring does not engage, the parking brake system has nothing to push on to “disengage.” | In any case, the piston will seem to be very low, lower than the dust boot wrinkles, before the snap ring engages. If the snap ring does not engage, the parking brake system has nothing to push on to “disengage.” | ||
| + | Hint 1: A G-clamp may not provide sufficient force to engage the snap ring. It may take 2-3 tons of pressure on a bench press before you hear the snap ring click into position. | ||
| + | |||
| + | Hint 2: Sometimes you can't push on the brake lever arm with the C-clamp to insert piston, you need to take off the arm and push on casting using socket. | ||
| − | Hint: | + | Hint 3: Tons of force may not really be necessary. There are two ways to do it even without a G-clamp. The first way is to wind in the worm shaft in to compress the spring - if you're lucky there will be enough friction to hold the spring compressed. Listen whilst you reassemble it in case it comes un-sprung. If it stays sprung, you should be able to get the snap ring to snap by hand pressure on the piston. Alternatively, mount the caliper in a vice. Using a pair of circlip pliers or whatever tool you use to retract the piston, wind the piston clockwise while at the same time applying a reasonable amount of pressure to drive the piston into the caliper. You should hear the circlip click in place. |
When the snap ring engages, reinstall the hex head stop peg. | When the snap ring engages, reinstall the hex head stop peg. | ||
| Line 191: | Line 232: | ||
[[Category:Brakes]] | [[Category:Brakes]] | ||
| + | [[Category:Lotus Elise]] | ||
| + | [[Category:S1]] | ||
| + | [[Category:S2]] | ||
Latest revision as of 12:10, 11 February 2020
Lotus Elise Rear Caliper Rebuild and Upgrade
This article originally contributed by 40mmBrakes ( http://40mmbrakes.auto.officelive.com/default.aspx )
Pre-Warning
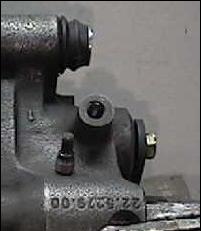
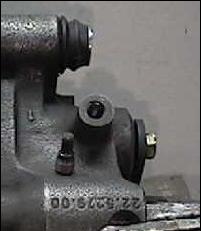
Before you start taking things apart, first ensure that your calipers are servicable. First make sure that you can remove the tiny grub screw that you can see in this photo. It needs a 4.5mm allen key which is a fairly unusual size. An alternative may be to use an imperial 3/16" allen key, although this is often a very tight fit and corrosion inside the allen socket may make it difficult to seat fully.
Unfortunately the grub screw sits deeply recesed in the boss of the caliper by 10-12mm. By the time your calipers reach an age where they would befefit from new seals, the thread in the boss has become so corroded that it's nigh-on impossible to remove the grub screw.
A no-harm solution is to fill the cavity with penetrating oil and come back tomorrow. The screw is in tight because the tapered end acts as a fluid seal; there is brake fluid on the opposite side. Once it breaks loose, it may not be that difficult to remove.
A brute force solution is to take an angle grinder to the boss and remove the excess material. Cut the boss flush with the top of the grub screw. The heat generated by this also helps to free up the screw.
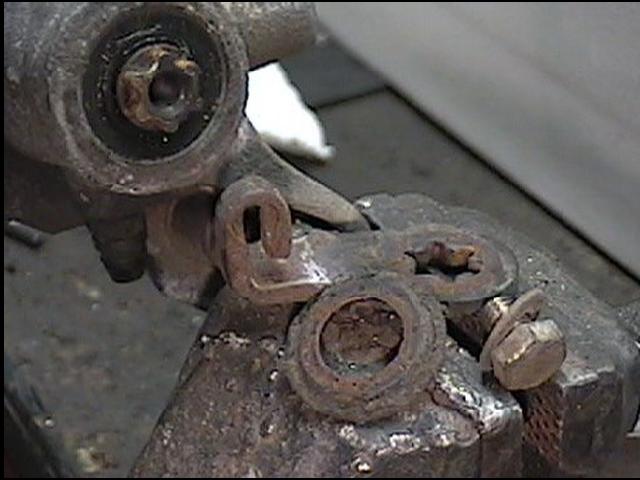
The other part to check is the 13mm bolt that holds the handbrake arm to the caliper. Make sure that this loosens as it has a tendency to go soft and shear off. In any case you should not expect the internals of the caliper to support the torque needed to loosen the bolt! The small parts that are engaged with parking brake actuation are not strong enough to resist the torque of a stuck bolt. You should put the handbrake arm (only) in a vise and unscrew the bolt so that the resistance torque is only applied to the arm.
Bear in mind that it's a straightforward job to refurb the sliders but examine your calipers carefully before attempting to replace the piston seals.
Repair
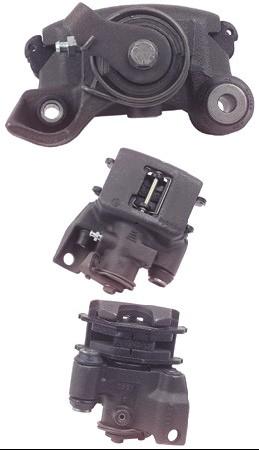
The service manual claims the Brembo Calipers fitted to the rear brakes of the Elise are not fully serviceable.
These instructions were developed by disassembling and reassembling many calipers and are not perfect.
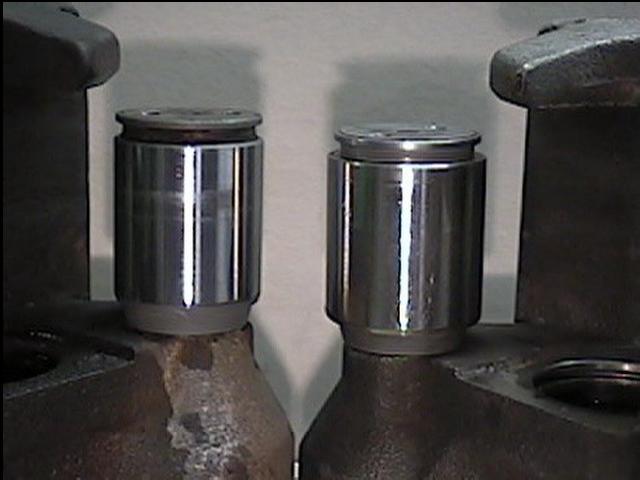
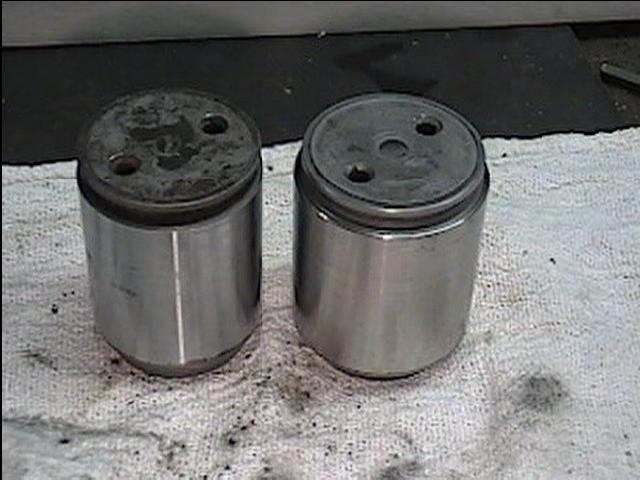
The Lotus Elise rear caliper is sometimes criticised as being too small. The rear caliper can be machined to accept a 38mm or even a 40mm piston and sleeve.
For the 38mm piston, you will need a Brembo 38mm seal, part number 05.5955.57
For the 40mm piston, you will need a Brembo 40mm seal, part number 05.5955.58
This conversion still allows the use of all the other standard size parts that come in the KC-83017 kit.
Procedure
Disassembly
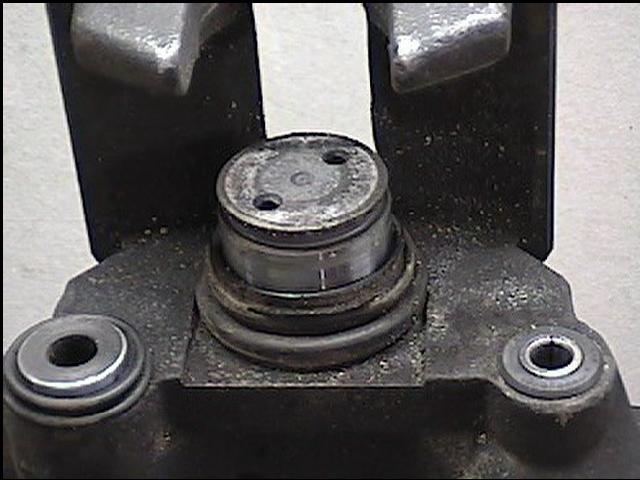
Unscrew piston as far as it will go using either a windback tool or stout needle nose pliers, one tip in each hole. Push in and rotate counter clockwise.
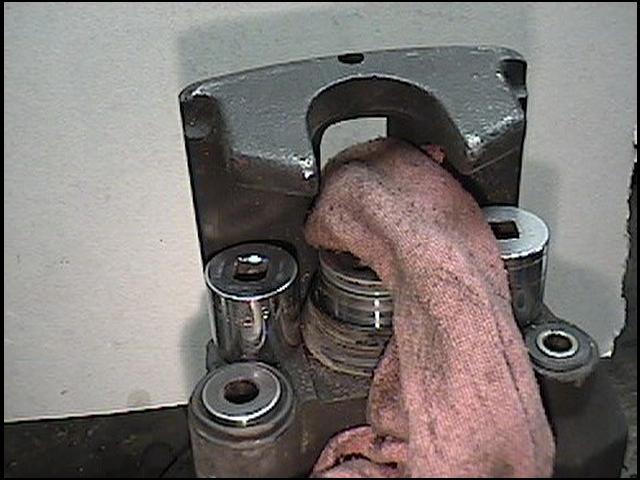
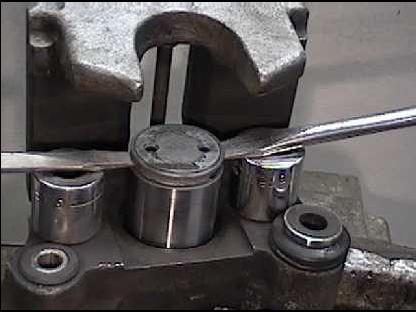
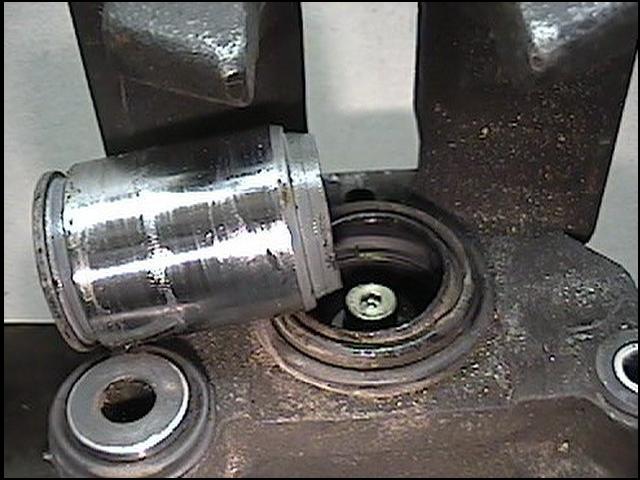
As the dust boot stretches, pull it out of the groove. The piston can be pried out with two screwdrivers. An internal snap ring holds it tightly, so be prepared to try a few times and apply some effort. Before it pops, it will feel “springy.” When the snap ring does pop, the piston will go flying, so put a rag over it to keep it from falling. You can use a socket on each side to support the screwdriver.
Here’s the prying position (without the dust boot and rag). From this image you can get a perspective of how far up the piston will rise without coming out. The piston can also be removed with air pressure into the brake line supply inlet.
Once the piston is out, do not turn the caliper over. There are several loose pieces inside that may fall out.
NB Only follow the following procedure if you have access to a new screw as 80% of the time they shear off & are not available to buy separately. You can get the whole assembly with the snap-ring out of the bore with some curved tools (eg. bend a screwdriver ) so it comes out as 1 piece. (Courtesy of Arno)
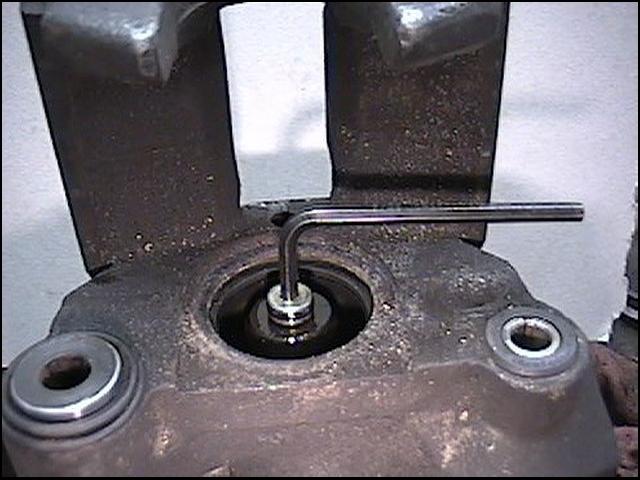
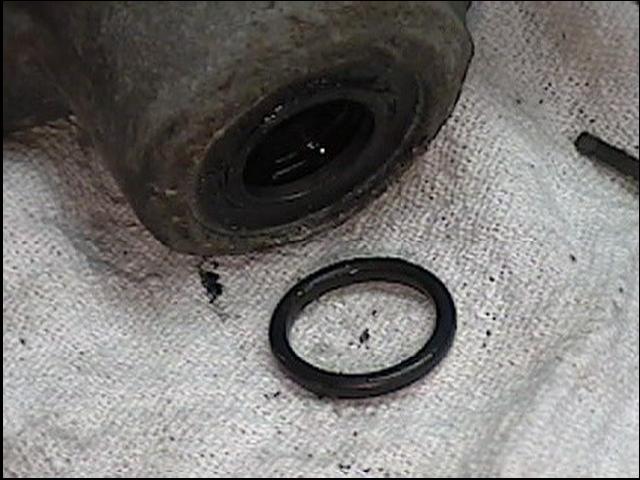
Remove the dust boot. With a 4mm allen key, remove the screw. This screw has an O-ring around the head, so do not reach in and use pliers. It is also held in with thread lock glue, so it feels a little stuck before it comes loose. It may also drag the whole way out. Use the proper allen key, since the metal is soft and you’ll easily round the hole.
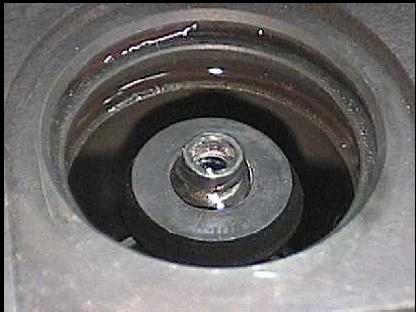
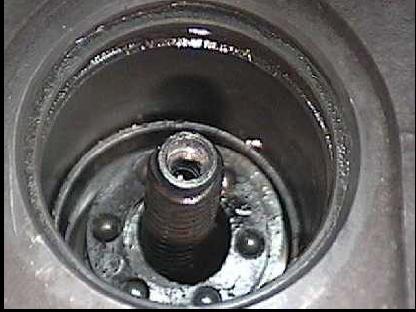
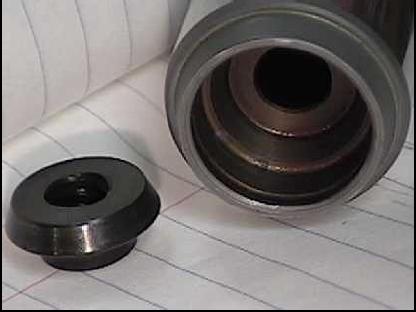
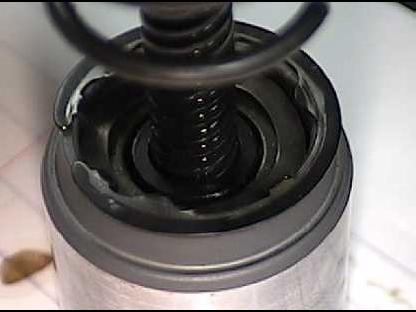
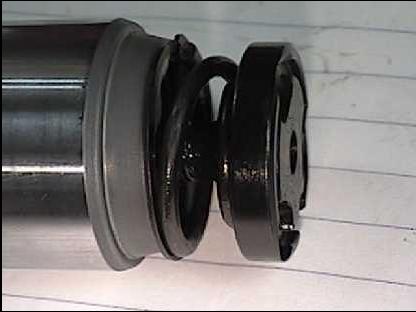
After the screw is removed, the threaded disc can be unscrewed and removed. This disc pushes on the inside of the piston when pulling on the parking brake.
Without the disc, a ball bearing race, a snap ring, and two washers will be visible in the bore. Turn the caliper over to remove them.
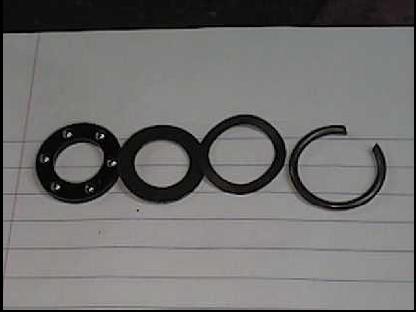
Here’s what will fall out:-
Ball bearing
Flat washer
Wave washer
Snap ring
Removing the worm thread shaft is next.
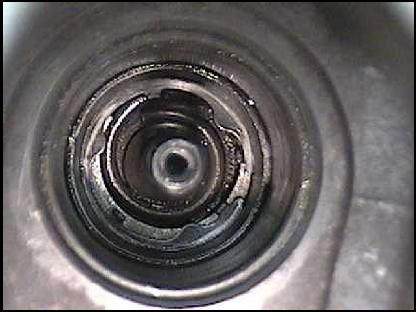
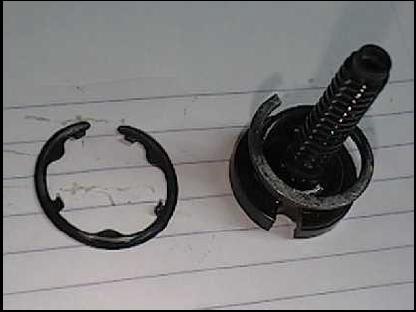
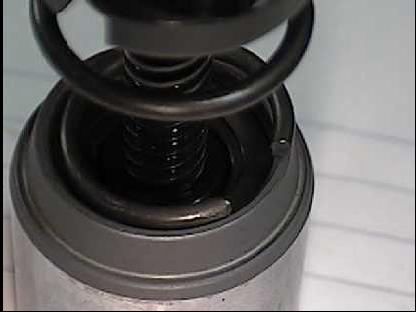
Look down into the bore for the internal snap ring. It has several tabs bent to point up at you. With a flat screwdriver, pry the tabs at the ends of the snap ring towards the center of the bore and disengage it from the groove in the wall.
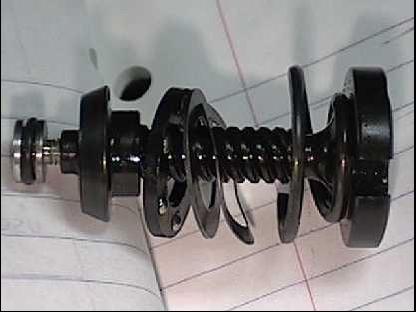
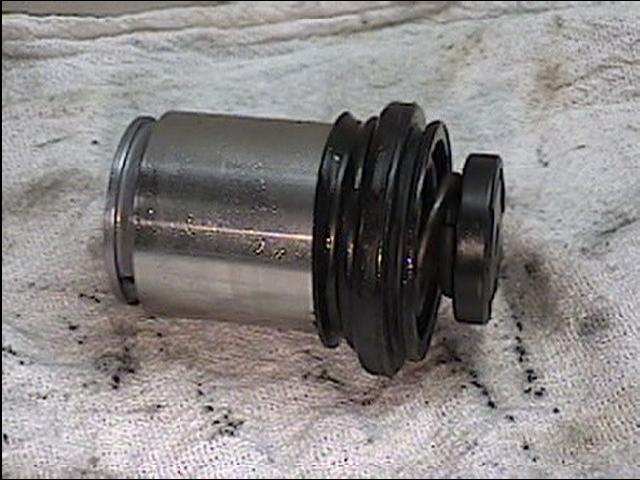
Now the worm shaft (and snap ring) can be removed. Notice the tabs.
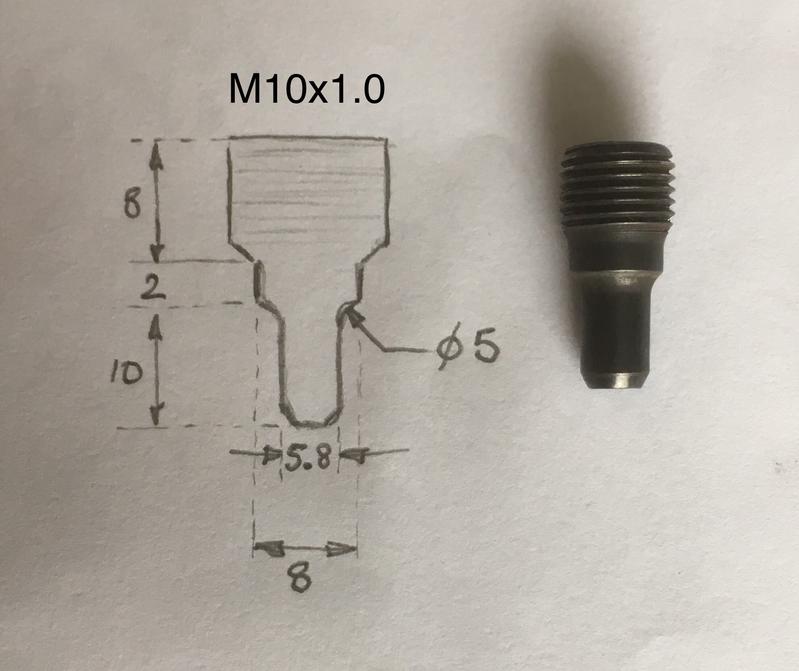
Unscrew the hex stop peg in the boss of the caliper. You will need a 4.5mm allen key which is an uncommon size.
In case the grub screw/peg strips and you need to drill it out, the following diagram shows the sizes:
By drilling (or preferrably milling) out at 9.5mm the threads should be spared and after drilling through deep enough the tapered section should be cut free and can be re-used with a normal M10x1.00 grubscrew to re-seal the hole. The remains of the thread can be picked out and cleaned up.
Remove the parking brake lever, parking brake shaft dust seal, and push the shaft into the caliper body.
The flat washer tends to stick in the caliper, be sure not to miss it.
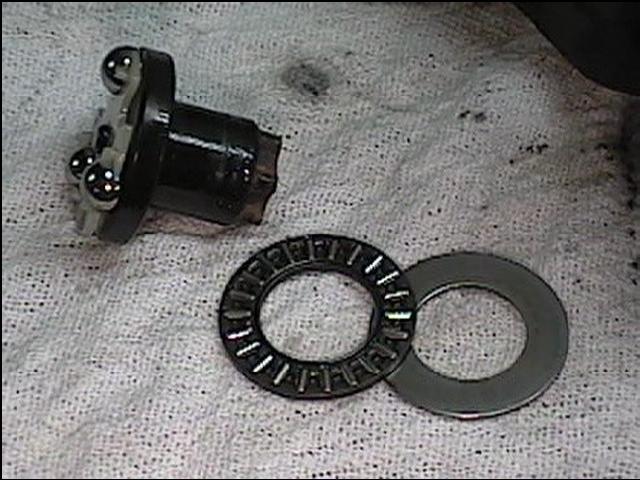
Remove the ball bearing drive plate, the needle bearing, and the flat washer.
Remove the old piston seal.
Reassembly
Install a new parking brake drive plate shaft O-ring, if needed.
Reinstall the flat washer, needle bearing, and ball bearing drive plate of the parking brake in the caliper body. Make note of where the three ball bearings are; you will need to mate them with the driven plate later.
The internal assembly will go back together in this order:-
Wave washer
Flat washer
Ball bearing
Cone screw
Use some thread lock on the O-ringed screw on reassembly. Install a new O-ring on the screw.
To reassemble the caliper, insert assembly into the piston and snap the {coat-hanger quality) internal snap ring into the piston.
The snap ring groove is just inside the piston.
Take the internal snap ring with the tabs, point the tabs downward, and use the tabs to clip the snap ring into the bottom
edge of the piston.
Then screw the worm shaft into the piston as far as it will go.
Install the new piston seal.
Stretch the new dust boot over the bottom of the assembled piston, leaving the lower edge of the boot to hang down. You will have to hold the piston over the bore and insert the boot lip into the groove all the way around before inserting the piston into the bore. The boot should look even (no bumps) if done properly.
Make note of where the ball bearing detents are.
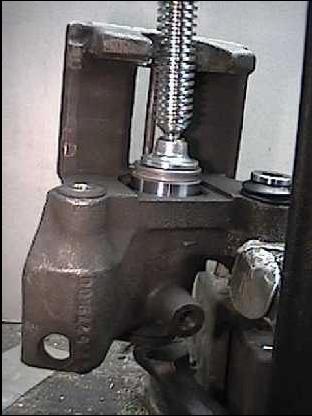
This is the tricky part. With the boot in the groove, centre the piston to begin pushing it into the bore. Use a c-clamp with a socket covering the parking brake shaft sticking out the bottom, making sure the clamp is pushing the piston straight down. Besides the normal problem of getting past the boot lip and the seal, the driven plate detents and the drive plate ball bearings must mate, otherwise you will not be able to push the piston down far enough for the internal snap ring to find it’s groove.
If the clamp seems to come to a stop and you have not heard the snap ring snap into place, try to rotate the clamp to rotate the piston and line up the ball bearing detents.
A second way is to temporarily attach the parking brake lever under the clamp to rotate the lever, which will move the drive ball bearings back and forth to line everything up.
Rotate the lever clockwise when facing the lever, as this also screws the threaded shaft into the cone shaped washer (ensuring that the piston is not bottoming on the parking brake adjustment.)
In any case, the piston will seem to be very low, lower than the dust boot wrinkles, before the snap ring engages. If the snap ring does not engage, the parking brake system has nothing to push on to “disengage.”
Hint 1: A G-clamp may not provide sufficient force to engage the snap ring. It may take 2-3 tons of pressure on a bench press before you hear the snap ring click into position.
Hint 2: Sometimes you can't push on the brake lever arm with the C-clamp to insert piston, you need to take off the arm and push on casting using socket.
Hint 3: Tons of force may not really be necessary. There are two ways to do it even without a G-clamp. The first way is to wind in the worm shaft in to compress the spring - if you're lucky there will be enough friction to hold the spring compressed. Listen whilst you reassemble it in case it comes un-sprung. If it stays sprung, you should be able to get the snap ring to snap by hand pressure on the piston. Alternatively, mount the caliper in a vice. Using a pair of circlip pliers or whatever tool you use to retract the piston, wind the piston clockwise while at the same time applying a reasonable amount of pressure to drive the piston into the caliper. You should hear the circlip click in place.
When the snap ring engages, reinstall the hex head stop peg. Using the parking brake lever, rotate the parking brake shaft while looking down into the stop peg boss. You will see the detent in the foot of the worm shaft. Screw in the stop peg so it engages the detent. You can check the proper operation by now rotating the parking brake lever again (which will push the piston out) and then rotating the opposite direction (which should slightly pull the piston back in.) With larger swings of the lever, this becomes a ratcheting action, so repeated back and forth with the lever will eventually move the piston further and further out; if the snap ring is engaged properly, the piston will slightly retract after each lever movement.
Once installed, the new 38mm calipers look exactly like the standard system.
Notes:
The brakes usually have to bled twice. It seems that air is trapped in the piston (the recess for the threaded parking brake adjustment rod) that isn’t flushed out during caliper installation.
The O-ring screw is a 10-32 thread. About 10% of the time it breaks when trying to remove it.
