Difference between revisions of "Nitron DIY refurbing"
(Created page with "The following was written by [http://forums.seloc.org/m/jouke Jouke] on the SELOC forum. Copied/stolen to the SELOC Wiki to preserve the info and images. = How to fix a stuc...") |
|||
| (6 intermediate revisions by the same user not shown) | |||
| Line 1: | Line 1: | ||
| − | + | [[Category:Suspension]] | |
| + | [[Category:Lotus Elise]] | ||
| + | [[Category:S1]] | ||
| + | [[Category:S2]] | ||
| − | + | = Articles on DIY maintenance and refurbishment on NITRON dampers = | |
| − | + | Here you will find assorted articles on maintaining, servicing and generally keeping your NITRON dampers in good shape. | |
| + | This does '''NOT''' include potential dangerous actions like opening or re-gassing the dampers. It's advised to have this always done by a professional rebuilder. | ||
| + | |||
| + | == How to fix a stuck Nitron adjuster == | ||
| + | |||
| + | ''The following was written by [http://forums.seloc.org/m/jouke Jouke] on the SELOC forum. Copied/stolen to the SELOC Wiki to preserve the info and images.'' | ||
| Line 18: | Line 26: | ||
- Then unscrew the bottom part (with the adjuster on it) from the rod. You can use a 17mm spanner on the chrome nut and another spanner on the bottom part. Use some cloth to protect the anodizing! | - Then unscrew the bottom part (with the adjuster on it) from the rod. You can use a 17mm spanner on the chrome nut and another spanner on the bottom part. Use some cloth to protect the anodizing! | ||
| − | [[File: | + | [[File:NItron-Adjuster2.jpg]] |
[[File:Nitron-Adjuster3.jpg]] | [[File:Nitron-Adjuster3.jpg]] | ||
| Line 29: | Line 37: | ||
- After getting the top part of, you can see the adjustment mechanism. Take out the pin first so you can unscrew the bottom part of the adjuster. | - After getting the top part of, you can see the adjustment mechanism. Take out the pin first so you can unscrew the bottom part of the adjuster. | ||
| − | [[ | + | [[File:Nitron-Adjuster5.jpg]] |
[[File:Nitron-Adjuster6.jpg]] | [[File:Nitron-Adjuster6.jpg]] | ||
- Clean and regrease. | - Clean and regrease. | ||
| + | |||
- Refitting is the reverse sequence to removal etc. | - Refitting is the reverse sequence to removal etc. | ||
| + | |||
| + | When refitting follow the following procedure to keep the adjuster working for the full range of damper settings: | ||
| + | |||
| + | * Rotate the adjuster fully to 'hard' so it bumps up against the aluminium carrier | ||
| + | * Back off the adjuster a little so it's just out of the last 'click' and riding between the last 2 'clicks' | ||
| + | * Gently screw the damper rod into the adjuster and stop when you feel some resistance | ||
| + | * Feel the adjuster and check you can still move it back and forth a little | ||
| + | * Keep screwing in the damper rod until the adjuster starts to bind/jam | ||
| + | * Back off the rod a little bit until the adjuster moves freely again (some resistance is OK) | ||
| + | * Tighten the lock-nut that holds the damper rod to the adjuster | ||
| + | * Check you now have all 23/24 'clicks' available again from hard to soft | ||
Not bad for a 7 year old damper! | Not bad for a 7 year old damper! | ||
[[File:Nitron-Adjuster7.jpg]] | [[File:Nitron-Adjuster7.jpg]] | ||
Latest revision as of 11:08, 23 July 2017
Articles on DIY maintenance and refurbishment on NITRON dampers
Here you will find assorted articles on maintaining, servicing and generally keeping your NITRON dampers in good shape.
This does NOT include potential dangerous actions like opening or re-gassing the dampers. It's advised to have this always done by a professional rebuilder.
How to fix a stuck Nitron adjuster
The following was written by Jouke on the SELOC forum. Copied/stolen to the SELOC Wiki to preserve the info and images.
After 7 years of use, one of my Nitron adjusters got stuck. The only way to get it to turn was by using molegrips on it. So it was time to figure out how to dismantle it!
After reading up on seloc and watching the Nitron promo video on youtube (https://www.youtube.com/watch?v=V850vsRVOCc), I decided to give it a go.
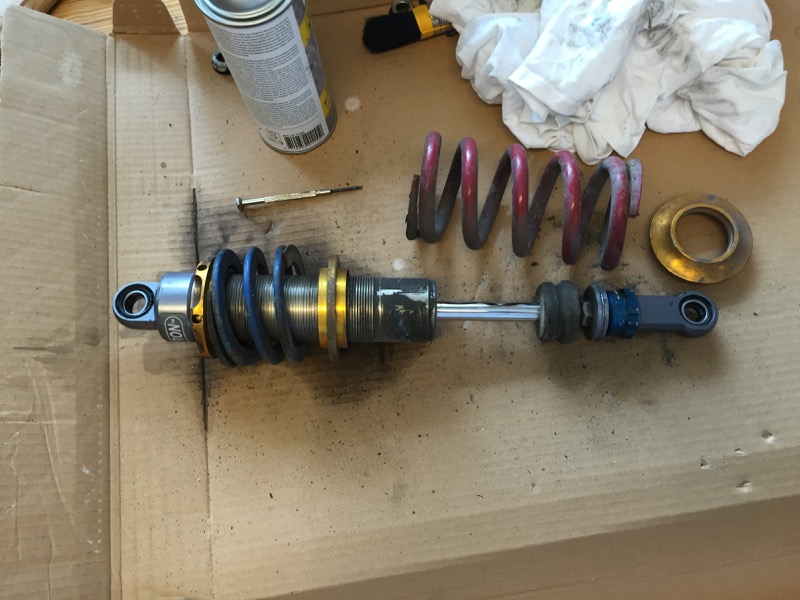
- First, take the damper of the car and get the spring(s) off.
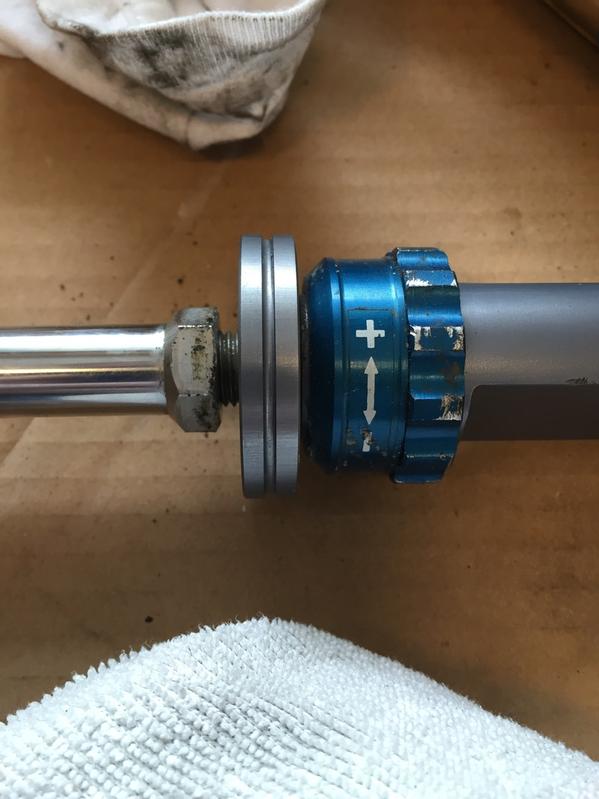
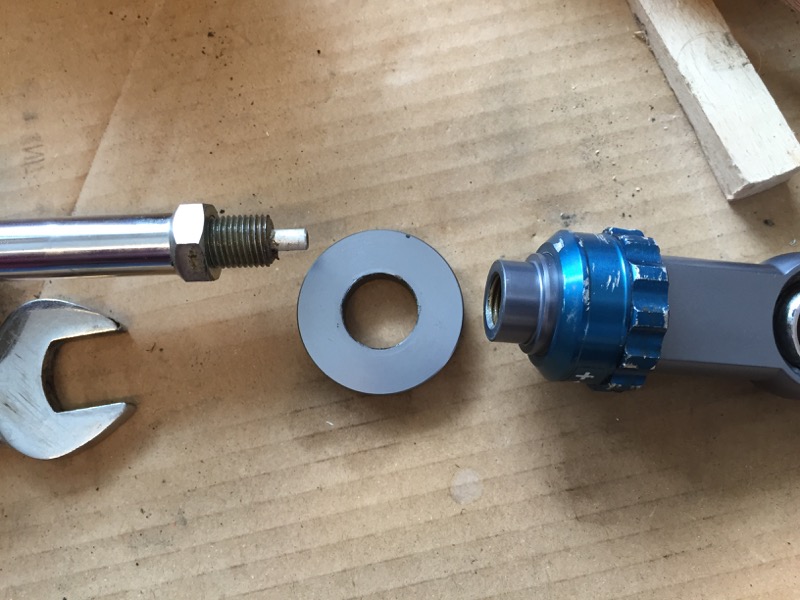
- Then unscrew the bottom part (with the adjuster on it) from the rod. You can use a 17mm spanner on the chrome nut and another spanner on the bottom part. Use some cloth to protect the anodizing!
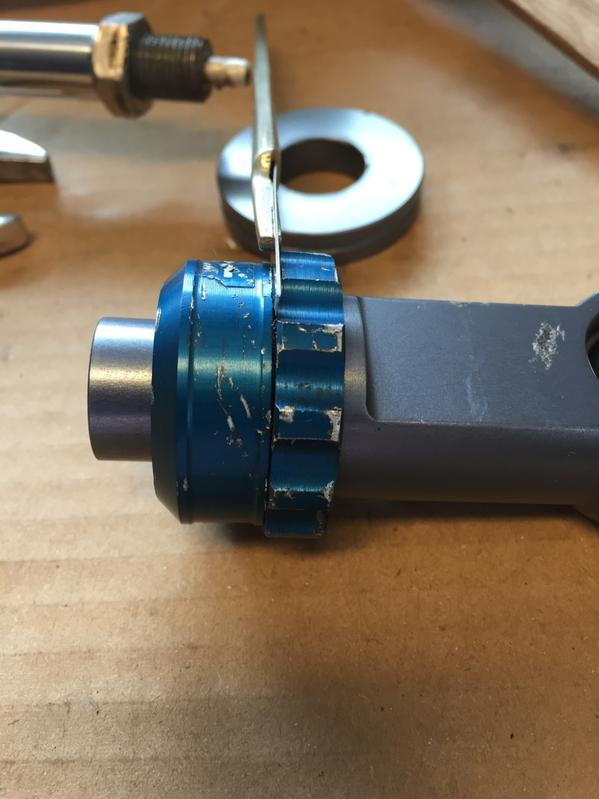
- Now, carefully insert a sharp blade into the groove in the adjuster. I had to lightly tap the blade to get the adjuster to part.
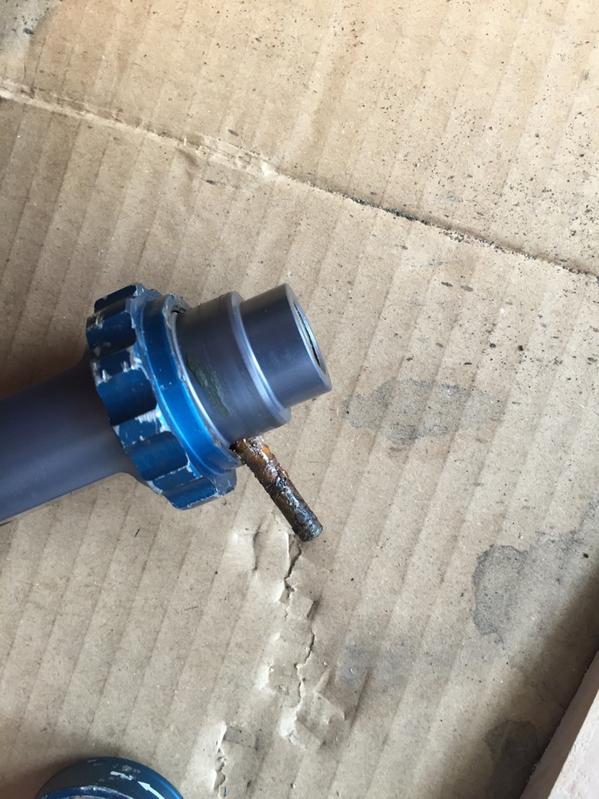
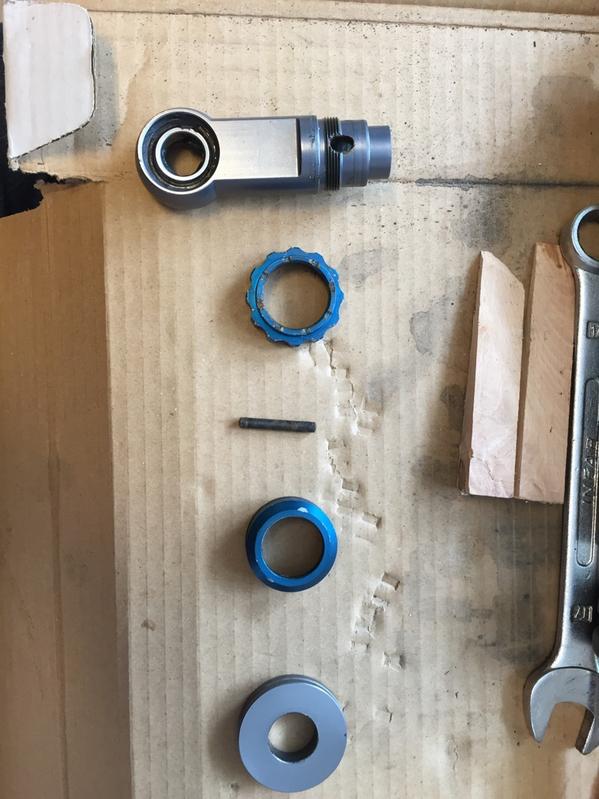
- After getting the top part of, you can see the adjustment mechanism. Take out the pin first so you can unscrew the bottom part of the adjuster.
- Clean and regrease.
- Refitting is the reverse sequence to removal etc.
When refitting follow the following procedure to keep the adjuster working for the full range of damper settings:
- Rotate the adjuster fully to 'hard' so it bumps up against the aluminium carrier
- Back off the adjuster a little so it's just out of the last 'click' and riding between the last 2 'clicks'
- Gently screw the damper rod into the adjuster and stop when you feel some resistance
- Feel the adjuster and check you can still move it back and forth a little
- Keep screwing in the damper rod until the adjuster starts to bind/jam
- Back off the rod a little bit until the adjuster moves freely again (some resistance is OK)
- Tighten the lock-nut that holds the damper rod to the adjuster
- Check you now have all 23/24 'clicks' available again from hard to soft
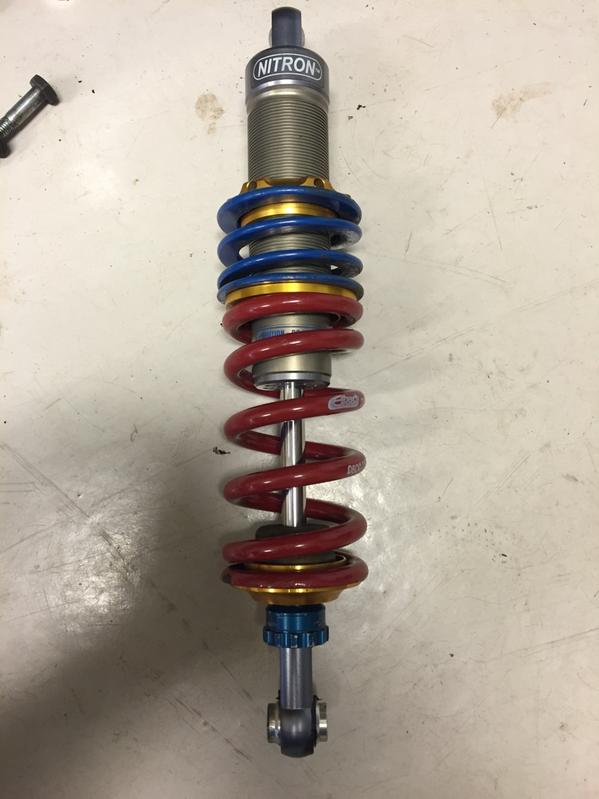
Not bad for a 7 year old damper!
