Difference between revisions of "Fitting S1 front indicators"
m |
|||
| (3 intermediate revisions by 2 users not shown) | |||
| Line 1: | Line 1: | ||
There are 2 ways of doing this. ***I SUGGEST METHOD 2***: | There are 2 ways of doing this. ***I SUGGEST METHOD 2***: | ||
| − | + | ====METHOD 1: THROUGH THE FRONT SERVICE HATCH (BONNET)==== | |
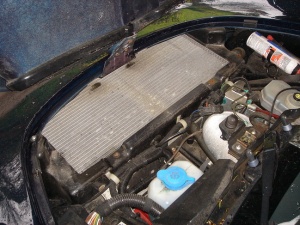
- Remove the rad surround first to give you a bit more space: | - Remove the rad surround first to give you a bit more space: | ||
| − | + | [[image:Without_rad_surround.JPG|thumb|left|Click me to make larger]] | |
| + | {{clr}} | ||
- Start with the Drivers side first as this is the easiest of the pair and will prepair you for the other side! | - Start with the Drivers side first as this is the easiest of the pair and will prepair you for the other side! | ||
| Line 13: | Line 14: | ||
- Put the new bulb in and leave the fitting on the rad for now. | - Put the new bulb in and leave the fitting on the rad for now. | ||
| − | - The nuts on the back of the indicator lenses are 7mm. | + | - The nuts on the back of the indicator lenses are 7mm. - '''make sure you have some before you start! The old ones may be rusted or missing altogether.''' |
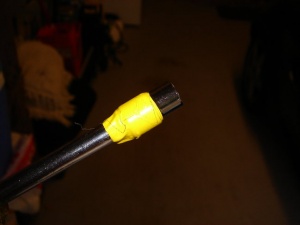
(TIP) tape the attachment onto the screwdriver tool so you dont drop it into the bay and loose it: | (TIP) tape the attachment onto the screwdriver tool so you dont drop it into the bay and loose it: | ||
| − | + | [[image:Tape.JPG|thumb|left|Click me to make larger]] | |
| + | {{clr}} | ||
- Reach round the side of the rad and feel your way onto the outside bolt first. Unsrew. | - Reach round the side of the rad and feel your way onto the outside bolt first. Unsrew. | ||
| Line 25: | Line 27: | ||
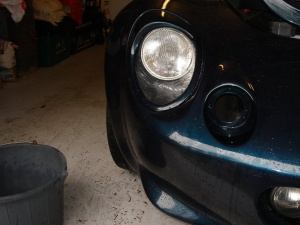
- Once the indicator is out give the recess a clean | - Once the indicator is out give the recess a clean | ||
| − | + | [[image:Wash.JPG|thumb|left|Click me to make larger]] | |
| + | {{clr}} | ||
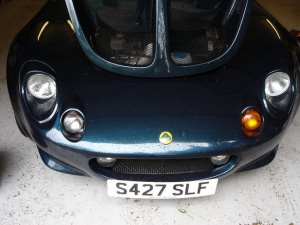
- Put the new indicator in and screw on the nuts: | - Put the new indicator in and screw on the nuts: | ||
| − | + | [[image:1_Orange_1_Clear.JPG|thumb|left|Click me to make larger]] | |
| + | {{clr}} | ||
- Screw the bulb fitting back into the back of the lense. | - Screw the bulb fitting back into the back of the lense. | ||
| Line 35: | Line 39: | ||
- On the passenger side The rad hose is in the way for the inside bolt and is extremely difficult to even get the ratchet onto, let alone be able to unscrew it! It can be done via method 1 but method 2 is much easier. | - On the passenger side The rad hose is in the way for the inside bolt and is extremely difficult to even get the ratchet onto, let alone be able to unscrew it! It can be done via method 1 but method 2 is much easier. | ||
| − | + | ====METHOD 2: THROUGH THE WHEEL ARCH==== | |
- Turn the wheels to full lock to the left. | - Turn the wheels to full lock to the left. | ||
| Line 43: | Line 47: | ||
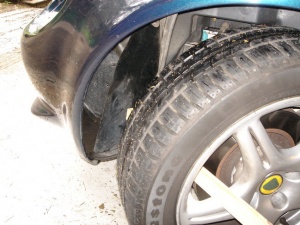
- Pull the lining out and use a piece of wood to peg it into place | - Pull the lining out and use a piece of wood to peg it into place | ||
| − | + | [[image:Arch_Liner.JPG|thumb|left|Click me to make larger]] | |
| + | {{clr}} | ||
| Line 53: | Line 58: | ||
| − | + | [[image:Tools.JPG|thumb|left|Click me to make larger]] | |
| + | {{clr}} | ||
- Wash the recess and fit the new lense as above | - Wash the recess and fit the new lense as above | ||
| − | + | [[image:Clear_Indicators.JPG|thumb|left|Click me to make larger]] | |
| + | {{clr}} | ||
- Screw the bulb fitting into the back of the lense. | - Screw the bulb fitting into the back of the lense. | ||
JOB DONE | JOB DONE | ||
| + | |||
| + | |||
| + | [[Category:Lotus Elise]] | ||
| + | [[Category:S1]] | ||
Latest revision as of 12:56, 17 April 2007
There are 2 ways of doing this. ***I SUGGEST METHOD 2***:
METHOD 1: THROUGH THE FRONT SERVICE HATCH (BONNET)
- Remove the rad surround first to give you a bit more space:
- Start with the Drivers side first as this is the easiest of the pair and will prepair you for the other side!
- Remove the bulb first by reaching in and unscrewing the fitting.
- Put the new bulb in and leave the fitting on the rad for now.
- The nuts on the back of the indicator lenses are 7mm. - make sure you have some before you start! The old ones may be rusted or missing altogether.
(TIP) tape the attachment onto the screwdriver tool so you dont drop it into the bay and loose it:
- Reach round the side of the rad and feel your way onto the outside bolt first. Unsrew.
- The nut on the inside of the drivers side indicator will need an extension tool because the rad may get in the way a bit. Unscrew
- Once the indicator is out give the recess a clean
- Put the new indicator in and screw on the nuts:
- Screw the bulb fitting back into the back of the lense.
- On the passenger side The rad hose is in the way for the inside bolt and is extremely difficult to even get the ratchet onto, let alone be able to unscrew it! It can be done via method 1 but method 2 is much easier.
METHOD 2: THROUGH THE WHEEL ARCH
- Turn the wheels to full lock to the left.
- Run your fingers round the wheel arch lining till you reach the top of the arch. You should be able to get you fingers underneath the liner here.
- Pull the lining out and use a piece of wood to peg it into place
- This method is much better than approaching it through the top.
- Remove the bulb fitting as in method 1 above.
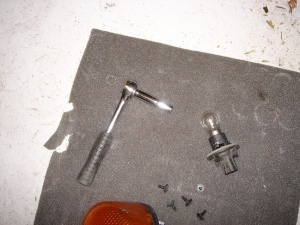
- Use the following ratchet to get the nuts off:
- Wash the recess and fit the new lense as above
- Screw the bulb fitting into the back of the lense.
JOB DONE
