Difference between revisions of "Remove the undertray"
Jump to navigation
Jump to search
m |
Lithopsian (talk | contribs) (the front undertray is a smaller rectangular tray at the well ... front of the car - remove comments that actually apply to the front undertray) |
||
| (One intermediate revision by the same user not shown) | |||
| Line 5: | Line 5: | ||
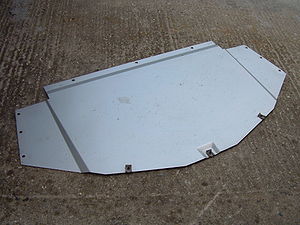
[[Image:Remove the front undertray step 4.jpg|thumb|left|Topside of front undertray from Elise S2]] | [[Image:Remove the front undertray step 4.jpg|thumb|left|Topside of front undertray from Elise S2]] | ||
| − | |||
| − | |||
| − | |||
{{clr}} | {{clr}} | ||
Latest revision as of 17:58, 5 March 2023
| Time & Tools | |
| Time: | 5mins |
|---|---|
| Tools: | 8mm Socket |
Procedure
Refitting
Not easy to refit without positioning yourself under the car.
- From below, slide the undertray inside the clamshell.
- Make sure it's the right way up!
- Key the rear of the undertray into the lip.
- Replace all 12 screws.
- The rear three screws are secured with Loctite.


