Difference between revisions of "Access panel"
m |
m |
||
| Line 10: | Line 10: | ||
'''To remove an access panel:''' | '''To remove an access panel:''' | ||
| + | |||
| + | '''Use Caution with the removed pannels as they are light and can damage easily when removed from car.''' | ||
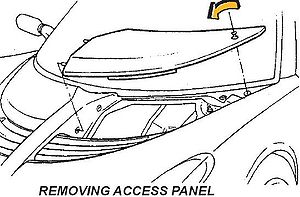
Use the hexagonal key supplied in the vehicle tool kit (in the battery cover rear pocket), to release the single threaded fastener securing the outboard corner of the panel, and withdraw the panel from the two locating holes in the front body spine. | Use the hexagonal key supplied in the vehicle tool kit (in the battery cover rear pocket), to release the single threaded fastener securing the outboard corner of the panel, and withdraw the panel from the two locating holes in the front body spine. | ||
| − | ''' | + | [[image:coversensor.JPG|thumb|left|Removing the Access Panels]] |
| + | {{clr}} | ||
| + | |||
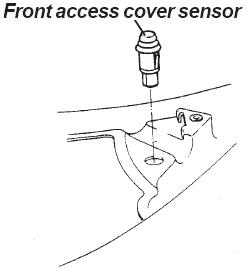
| + | '''Dont forget that the front access panels are protected by a alarm sensor.''' | ||
| + | |||
| + | |||
===How To Refit=== | ===How To Refit=== | ||
Revision as of 11:01, 19 January 2007
Elise S2 Access panels
Two removeable, body colour composite panels are provided in the front body to allow access to the front fusebox and brake fluid reservoir.
How To Remove
To remove an access panel:
Use Caution with the removed pannels as they are light and can damage easily when removed from car.
Use the hexagonal key supplied in the vehicle tool kit (in the battery cover rear pocket), to release the single threaded fastener securing the outboard corner of the panel, and withdraw the panel from the two locating holes in the front body spine.
Dont forget that the front access panels are protected by a alarm sensor.
How To Refit
To refit a panel:
Hook the extended lip on the front edge of the panel beneath the rear edge of the louvre panel before engaging the two locating pegs on the inboard side of the access panel with the grommeted holes in the front body spine. Fit the single screw at the outboard corner of the panel into the captive nut in the body, taking care not to cross-thread or overtighten the screw. Re-stow the hexagonal key in the tool kit. Note that the outboard fastener uses a mounting plinth adjustable in height to allow optimum panel alignment to be achieved.
WARNING: Ensure the access panels are refitted and properly secured before driving.
Exige S2
The access panels on the Exige model are shorter front to back than those of the Elise, and are retained by three socket head screws, the outermost of which features an adjustable plinth to allow panel height adjustment.

