Difference between revisions of "Replace Headlight S1"
m |
m |
||
| Line 9: | Line 9: | ||
[[Image:WheelArchHoldBack.jpg|thumb|left]] | [[Image:WheelArchHoldBack.jpg|thumb|left]] | ||
| + | {{clr}} | ||
Unplug the electrics from the back of the headlight and remove the bulb and sidelight tail. | Unplug the electrics from the back of the headlight and remove the bulb and sidelight tail. | ||
| Line 15: | Line 16: | ||
There should be 3 bolts around the headlight. Elise Parts sell wingnuts, and a piece to replace these if they are falling off [http://www.eliseparts.com/shop/index.php?main_page=product_info&cPath=161&products_id=356 Clam headlight bracket] | There should be 3 bolts around the headlight. Elise Parts sell wingnuts, and a piece to replace these if they are falling off [http://www.eliseparts.com/shop/index.php?main_page=product_info&cPath=161&products_id=356 Clam headlight bracket] | ||
| − | [[Image:ClamHeadlightBolts.jpg]] | + | |
| + | [[Image:ClamHeadlightBolts.jpg|thumb|left]] | ||
| + | {{clr}} | ||
Take a picture of each light so that you can put them back in at the same angle as the old ones. The patterns on the headlight glass should not be 'vertical'. | Take a picture of each light so that you can put them back in at the same angle as the old ones. The patterns on the headlight glass should not be 'vertical'. | ||
| − | [[Image:PassengerNearSide.jpg]] | + | [[Image:PassengerNearSide.jpg|thumb|left]] |
| − | [[Image:DriversOffSide.jpg]] | + | [[Image:DriversOffSide.jpg|thumb|left]] |
| − | + | {{clr}} | |
The headlight is attached to the metal surround by 3 small screws, again these may be rusted. | The headlight is attached to the metal surround by 3 small screws, again these may be rusted. | ||
| Line 28: | Line 31: | ||
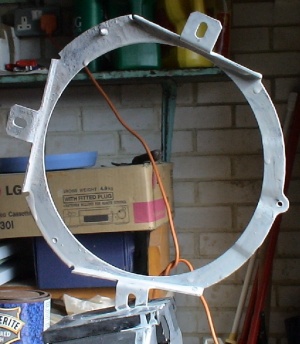
I then painted the headlight surround with hammerrite to cover the rust and hopefully make them last a few more years | I then painted the headlight surround with hammerrite to cover the rust and hopefully make them last a few more years | ||
| − | [[Image:PaintedSurround.jpg]] | + | [[Image:PaintedSurround.jpg|thumb|left]] |
| + | {{clr}} | ||
Replace the headlight taking care to put it back at the same angle. Put it back onto the claim with springs and loosely tighten the wingnuts. Reattach the wiring | Replace the headlight taking care to put it back at the same angle. Put it back onto the claim with springs and loosely tighten the wingnuts. Reattach the wiring | ||
Revision as of 12:04, 17 April 2007
Replacing headlights is quite easy to do.
First mark out a stop line in front of a flat wall. Switch on the lights and mark the pattern on the wall. Each light should turn up on the left hand side (for a UK car), mark this 'corner' so that you can position the light and the correct level and pointing correctly left/right.
I jacked each side up and did each headlight separately, it would be quicker to raise the front and take both wheels off.
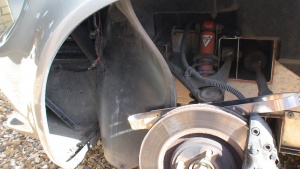
Remove the rubber grommits holding the front of the wheel arch. Pin back the wheel arch to give you room to work (a 2 foot stick is ideal). Note there is no need to remove the fuse boxes/ tyre weld bolted too them.
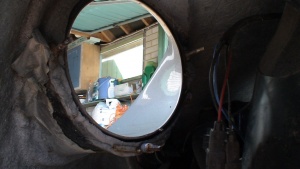
Unplug the electrics from the back of the headlight and remove the bulb and sidelight tail. The headlight is in a metal surround. The surround is attached to the car by three bolts and three spring loaded plastic wingnuts. The bottom one will probably be rusted so spray with WD40 to free things up. Carefully remove the wingnuts taking care to ensure you make sure the spring doesn't disappear.
There should be 3 bolts around the headlight. Elise Parts sell wingnuts, and a piece to replace these if they are falling off Clam headlight bracket
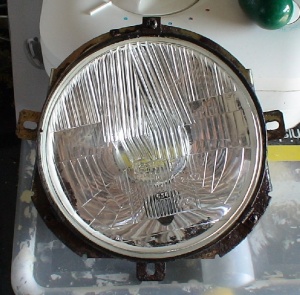
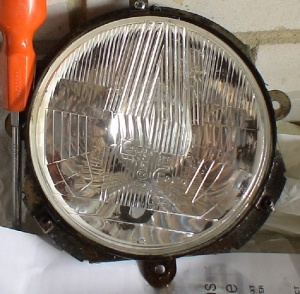
Take a picture of each light so that you can put them back in at the same angle as the old ones. The patterns on the headlight glass should not be 'vertical'.
The headlight is attached to the metal surround by 3 small screws, again these may be rusted.
Remove the headlight.
I then painted the headlight surround with hammerrite to cover the rust and hopefully make them last a few more years
Replace the headlight taking care to put it back at the same angle. Put it back onto the claim with springs and loosely tighten the wingnuts. Reattach the wiring
Replace wheels, and put the car back in the same position and then adjust the wingnuts round the headlight to match it up with the orginal markings.
I took the car along to my local garage to check on their light alignment tool, but nothing needed adjusting.
