Difference between revisions of "Remove S2 Dash Top"
Sime george (talk | contribs) |
Sime george (talk | contribs) |
||
| Line 49: | Line 49: | ||
===Remove dash top=== | ===Remove dash top=== | ||
| − | The manual says to remove the plastic finished above the climate controls : I did this but it was | + | The manual says to remove the plastic finished above the climate controls : I did this but not entirely sure it was required |
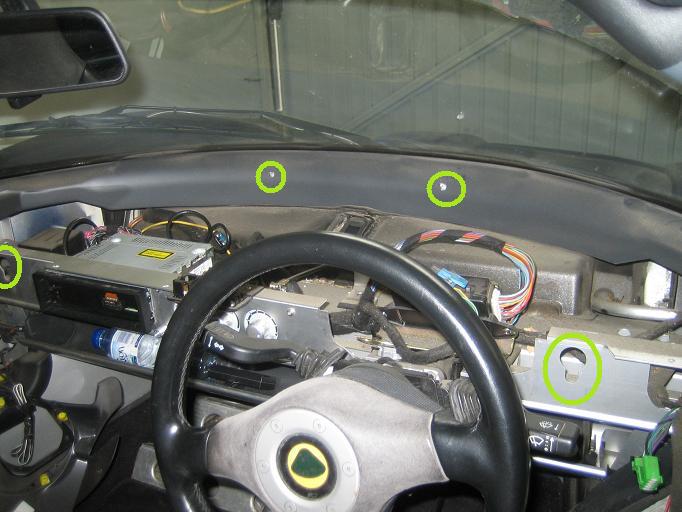
Now remove the dash top by lifting the nearmost edge of the dash (to release the locating bosses from the keyhole slots in the dash) and pulling it towards you. | Now remove the dash top by lifting the nearmost edge of the dash (to release the locating bosses from the keyhole slots in the dash) and pulling it towards you. | ||
Revision as of 20:20, 19 June 2008
How to remove the dash top from an S2 Elise
The process is described in the S2 Service Manual, section BP pages 19-21. My car (2002 model) was a little different to the manual however so the following guide might be useful.
Remove both front speaker grilles and speakers
Straightforward.
Remove both speaker panels
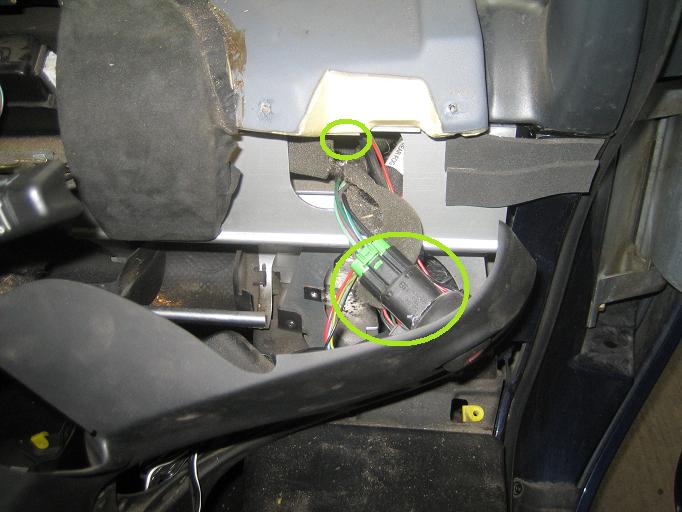
On the driver's side one you will need to disconnect the hazard warning light switch. The manual says to disconnect everything but it's not needed (and not obvious to me how to disconnect the light switches anyway - didn't want to break anything !) The picture below shows what to disconnect (lower green circle)
Remove plastic capping panel
The manual says to remove the air vents from the panel. Only the topmost rotating bit needs to be removed here. On my car there were 2 screws in each vent attaching the capping panel to the dash facia panel. These are not mentioned in the manual, and will need to be removed. The capping panel can then be pulled free (with a bit of force !)
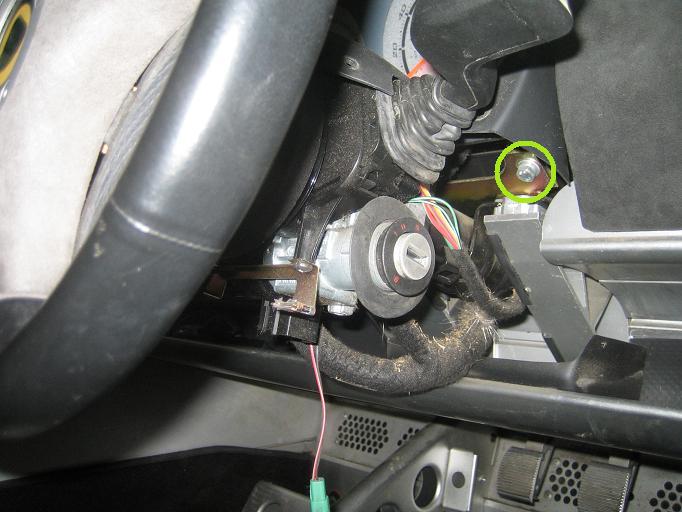
Remove the two screws holding the dash facia to the frame. The drivers side one is shown on the picture above (upper green circle), and the passenger one is found likewise.
Remove steering column upper and lower shrouds
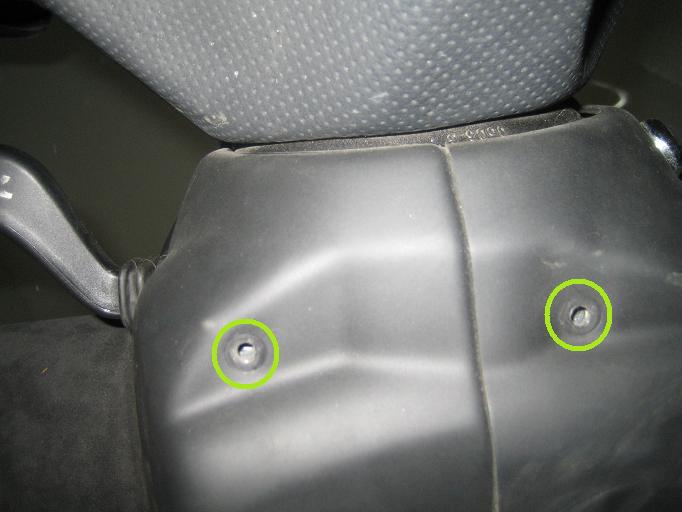
The lower shroud is held on by two screws (on my car anyway - the manual says 3 screws...), as shown below. The manual says to disconnect the trip button but I didn't see a need to - the wire is long enough to let the shroud rest on the floor while you continue working
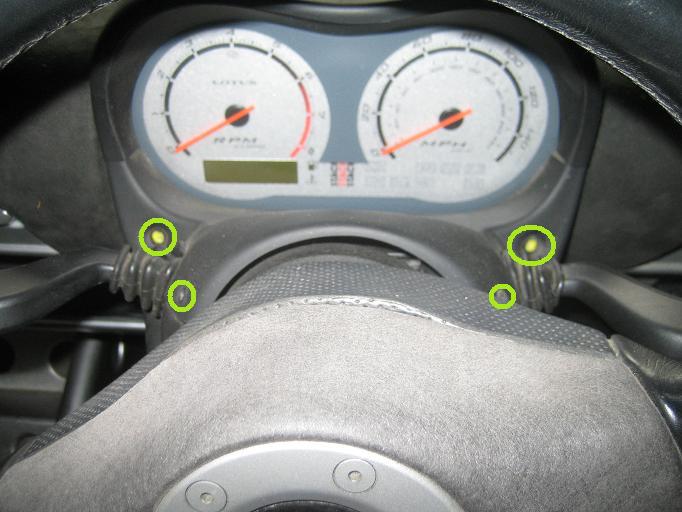
The upper shroud is held on by four screws as shown below
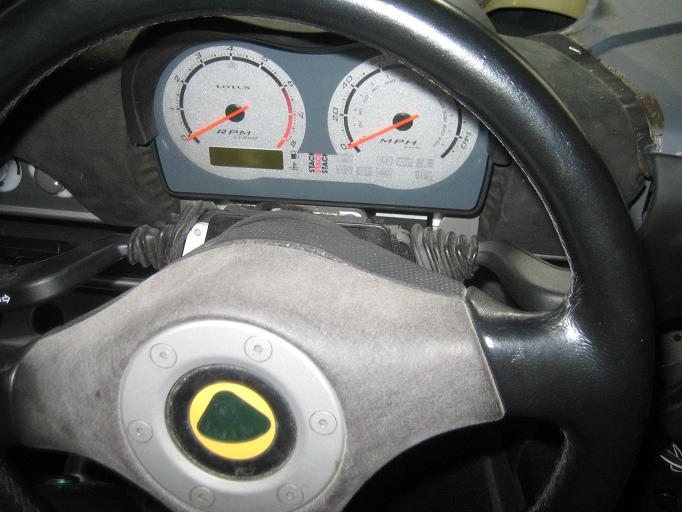
Remove instrument pack
The instrument pack is secured by two bolts (M11 IIRC), one of which is shown below
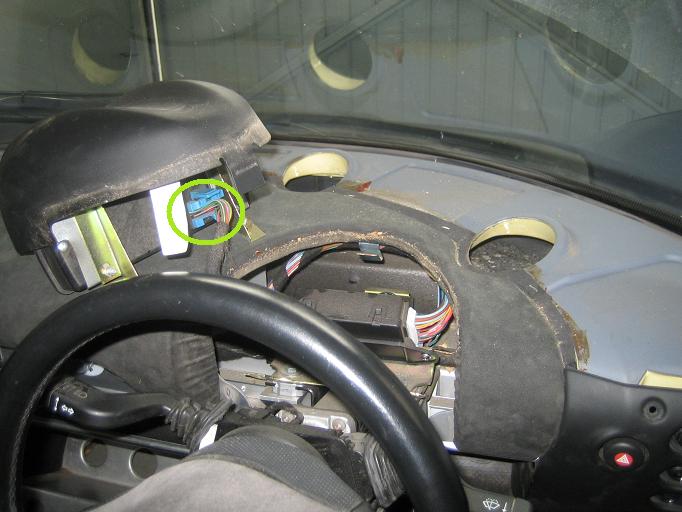
Disconnect the wiring harness from the instrument pack
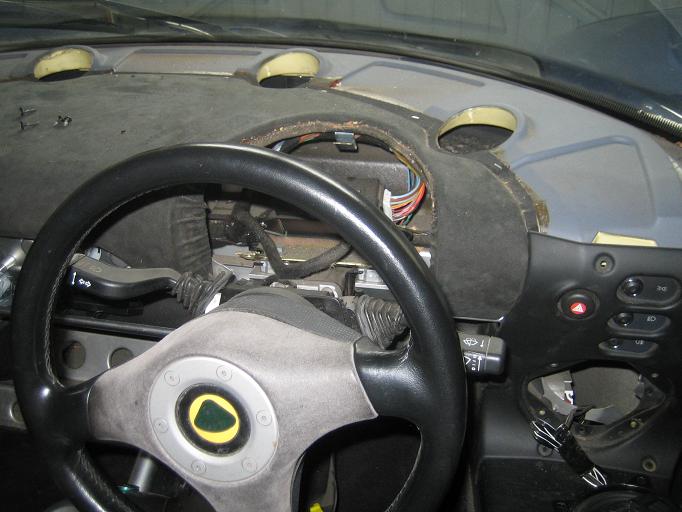
Remove dash top
The manual says to remove the plastic finished above the climate controls : I did this but not entirely sure it was required
Now remove the dash top by lifting the nearmost edge of the dash (to release the locating bosses from the keyhole slots in the dash) and pulling it towards you.
Re-fitting
Basically the reverse of the above. Only tricky bit is re-assembling the steering column shrouds and instrument pack : loosley assemble the shrouds first before replacing the instrument pack and then tighten everything up.
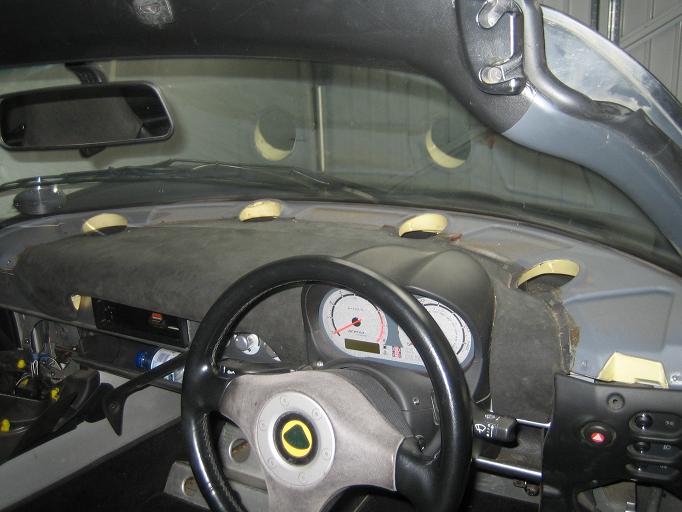
The image below shows the keyhole slots (bottom green circles) and spigot pin holes (top green circles) that the dash top slots into on refitting.
