Difference between revisions of "Installing an iPod radio"
happy.smiler (talk | contribs) |
m |
||
| Line 50: | Line 50: | ||
6. Press the radio firmly into mounting sleeve, there are two catches, one either side of the mounting sleeve, this stops the radio from being removed easily. | 6. Press the radio firmly into mounting sleeve, there are two catches, one either side of the mounting sleeve, this stops the radio from being removed easily. | ||
[[Image:IMGP1356.jpg|none|140px|]] | [[Image:IMGP1356.jpg|none|140px|]] | ||
| + | |||
| + | |||
| + | [[Category:Electrical]] | ||
| + | [[Category:Lotus Elise]] | ||
| + | [[Category:S1]] | ||
| + | [[Category:S2]] | ||
Revision as of 13:49, 1 August 2007
This is a guide to how to fit an iPod radio an S2 Elise.
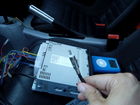
The radio that I have installed is an Alpine, CDE-9881R with an iPod cable, (KCE-422i.)
There are a few thing you need to be aware of
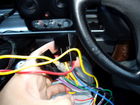
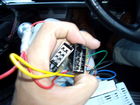
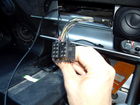
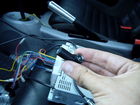
This radio came with ISO adaptor cable that plugged in to the radio and then the Elise´s ISO connectors.
These are the ISO connectors from the Elise...
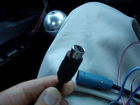
The iPod radio´s aerial connector is also called ISO, as well or JASO.
This will not fit in to the aerial cable on the Elise, as the connector a DIN connector.
It was necessary for me to purchase a ISO to DIN aerial connector, as it is not possible to force the DIN connector in to the ISO connector.
Here it is plugged in.
1. Remove the old radio and mounting sleeve.
2.1 To install the iPod cable, (KCE-422i,) remove the passenger side speaker grill and speaker.
2.2 Remove the black plastic lower part of the dash, this has two screws at the top and two at the bottom, twist from the bottom as this will gently pull the black plastic insert away from the passenger dash tray.
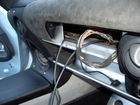
2.2 The tread the iPod cable through the whole where the radio goes, then pass it to the left, as far as it will go, then put you hand up, where the lower part of the black dash was and pull the cable, then thread the required amount on to the passenger tray.
2.3 Replace the black plastic lower part of the dash, and then the speaker grill and speaker.
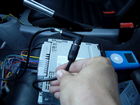
3. Before fitting the radio into the mounting sleeve, test it. Connect all cables. It is worth checking the positive power cables, it is possible that the switched power and the constant power are the wrong way around. To test this turn the ignition on, set one of the radio stations, then turn off the ignition, wait a few seconds, turn on the ignition again. Has the radio remembered the radio station? If not change the red and yellow wires around. I did not need to do this, it worked correctly first time.
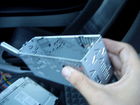
4. Fit the new mounting sleeve.
5. Bind together all the cables with Electrical insulation tape, this makes it easier to get all the cables in the right place while putting the radio in to the mounting sleeve.
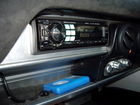
6. Press the radio firmly into mounting sleeve, there are two catches, one either side of the mounting sleeve, this stops the radio from being removed easily.
