Battery
Battery Coding
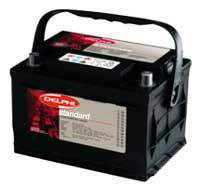
Most common batteries have a type number (UK) & this generally decides the physical size & the pole type/configuration but not the current rating as type numbers are available in several capacities eg 44A to around 70A.
The more modern numbering system is the ETN system.
eg 580-063-039
In which the 1st three digits are the current rating (-500) then the configuration & physical size (type number 063) & the last three are cold cranking (X100) so in this example the battery specs are: 80A - type063 - 390A cold cranking.
- Voltage - 12V
- Capacity - 55Ah
- CCA(EN) - 540A / 390A / 450A (but not important)
- Dimensions(mm): 242 x 175 x 175
Battery "Conditioning"
Please add Info
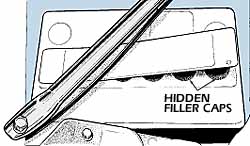
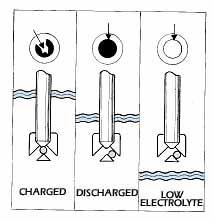
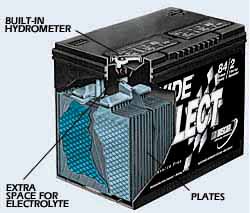
Like many things in life, the term “maintenance-free” is only partially true. Lead-acid batteries normally consume some of the water in their dilute sulphuric acid electrolyte during a normal charge-discharge cycle. It actually electrolyzes into hydrogen and oxygen and escapes as gas. So adding water periodically is necessary to keep the plates flooded. Maintenance-free batteries use a calcium alloy of lead instead of an antimony alloy, which reduces the amount of electrolysis. In addition, the amount of free-standing electrolyte above the plates is designed to be much higher in a new maintenance-free battery. This means that there’s enough electrolyte to keep the plates covered even after a few seasons of normal use. So, during the battery’s normal service life there should be no need to add water. Any abnormal electrical system condition or high ambient temperatures may boil off more than the normal amount of water, however. Adding water may extend the service life of these supposedly maintenance-free batteries, although one should be careful not to over dilute the electrolyte level.
The extended use of battery chargers or conditioners may also cause the electrolyte levels in the cells to be reduced. Indeed, some battery conditioners that are marketed as being suitable for permanent connection are not suited for this - they can also reduce the electrolyte level over time. This is because they deliver a constant, albeit very low, current to the battery which drains the cells dry of electrolyte.
A truly intelligent conditioner should not have this problem, as they monitor the charge in the battery, adjusting the charge given to the battery as necessary. The Accumate is one such charger, although there are others that should be suitable.
Halfords - K-Series
Code: Type 063
It is on their computer system if you cant remember and need to ask them. Also remember there is a SELOC discount for all members at Halfords - check the benefits pages for instructions.
They might offer to fit it, but after checking their computer they'll find a warning that they've had problems with Elise immobilisers, and then decline to fit it for you. Allegedly their problem was with immobilisers on early S1's, but don't fear, just following the handbook procedure for S2's certainly produced no problems at all.
S1 Fitting
The Bosch Silver plus battery is difficult to get but I am assured the Varta silver plus is the same battery re-badged - it sounds plausible as it has the same part number 543-107-048.
You will need a torks screwdriver to remove the plastic blind rivets which attach the radiator cowl.
Remove the plastic cover over the wiper motor cover also, these just make space to manoeuvre the battery.
Remove the windscreen washer bottle, the battery clamp it attaches to and its three screws.
I had to cut two tie-wraps to free some cables below the radiator cowl - so I could pull them out of the way.
As with all car batteries always remove the negative terminal first and reattach it last - in case the spanner shorts the terminal to the cars bodywork this will prevent sparks / red hot spanners; [this is reversed on positive earth cars].
The battery is a bit of a tight squeeze but you should now be able to lift it out of the car.
The new battery does not have the same type of handle as the Lotus part.
People have suggested using a piece of wood to make up the difference, or even manufacturing a new bracket. I just cut the handle off the the old battery and stuck it onto the "step" on the old one with some sticky foam pads.
Lotus sell a modified battery clamp for about a tenner [part. E111M0025F] which will fit even better but that means you have to remember to order it.
Eliseparts also sell an adjustable battery clamp which allows adjustment for both height and width of the new battery.
The supplier assured me the battery was sealed - IT IS NOT!
There are two vent holes on either side of the battery, about 1/4 inch in diameter. I used the passenger side one for the vent pipe, and plugged the driver's side one with the blanking plug which comes free, moulded onto the battery's handle.
The battery breather is Very important, not fitting the battery breather or forgetting to plug the second hole the Varta batteries have can mean concentrated sulphuric acid sloshing around inside your car - Not a good thing.
Remember to smear the terminals with vaseline before reattaching the cables, this helps stop corrosion.
If you are keen, remove the other end of the earth strap where it attaches to the chassis and clean it with emery paper, grease it with vaseline and refit - this can help with the "Engine temperature appears to change when I turn on the heater fan" problem.
Took me 40 mins, would have been half that if I had known the above beforehand.
S2 K-series Fitting
The procedure is described in the Owners Handbook and is pretty self explanatory:
1. Undo the retaining clamp at the base of the battery (6mm Allen key required), and slide the battery out of the retaining shoe so you have easy access to the terminals. If you're doing this on your own - loosen the negative black earth cable nut slightly BUT DON'T DISCONNECT IT JUST YET.
2. Turn all lights, radios, satnav etc equipment off.
3. Turn the ignition off and wait about 10 seconds for the engine management system to settle down.
4. DON'T arm the alarm or immobiliser
5. Within 25 seconds of turning off the ignition (i.e. before the immobiliser/alarm kicks in), disconnect the negative black earth cable from the battery. ALWAYS disconnect the black first.
6. Disconnect the positive red cable from the battery.
7. Swap the old battery out, transfer the terminal connectors to the new battery, put the new battery into the boot so you can work on it to reconnect the terminal cables.
8. Connect the positive red cable to the new battery.
9. Connect the negative black cable to the new battery (have the keyfob to hand just in case the alarm goes off). ALWAYS reconnect the black last.
10. Slide it back into the retaining shoe, refit the 6mm clamp.
S2 Yota Fitting
Battery Removal
You'll need "couple of spanners and or socket set, 8mm or 10mm"
Then ........
When disconnecting the battery, ALWAYS disconnect the negative terminal first.
When reconnecting the battery, ALWAYS connect the negative terminal last.
When jumping/charging batteries, hook up the positive terminals first, then negative (whether it's to the battery or to some convenient point on the chassis/engine).
Once jumped/charged, remove negative first, then positive last.


