Difference between revisions of "Headlining"
m |
|||
| (6 intermediate revisions by the same user not shown) | |||
| Line 123: | Line 123: | ||
And finally in the process of cleaning the roof I probably penetrated the glue holding on the rear foam strip (visible on inside of rood above as a black horizontal strip between the door pillar clamps) which prevents drafts and potentially water ingress. I found this product https://www.expandingfoamtape.co.uk/collections/6-15mm/products/expanding-foam-tape-20-6-15 which measures the right size expanded but is not really compressed in the Lotus apart from on the edges.... | And finally in the process of cleaning the roof I probably penetrated the glue holding on the rear foam strip (visible on inside of rood above as a black horizontal strip between the door pillar clamps) which prevents drafts and potentially water ingress. I found this product https://www.expandingfoamtape.co.uk/collections/6-15mm/products/expanding-foam-tape-20-6-15 which measures the right size expanded but is not really compressed in the Lotus apart from on the edges.... | ||
| − | ... to be | + | {| class="wikitable" |
| + | |- | ||
| + | ! rowspan="2" | [[image:Expanding_foam_tape.jpeg|200px]] | ||
| + | ! Expanding Foam Tape | ||
| + | |- | ||
| + | | Hoping it expands to 20mm! | ||
| + | |- | ||
| + | |} | ||
| + | |||
| + | ===And the end result?=== | ||
| + | |||
| + | Well I took a bit of advice from the marine reupholsters and suppliers of the contact glue in NOT using a roller to smooth it out, as they suggested it made force the glue through the foam backing and onto the surface of the cloth face. | ||
| + | |||
| + | I started in the middle with the roof on its back, and aligned the ribbing width-ways. Whilst choosing a side to work on I tried to keep it taught but smooth from the inside out, focusing on concave/inside corners and creases until I reached the edge where the window glass rubber sits. I tried to get it as close as I could right around the edge. | ||
| + | |||
| + | I'm not sure how much extra effort it is but if I was to do this again I would remove the rubbers so the fabric could go behind rather than what I attempted which is a straight edge to butt up to the rubber seals. | ||
| + | |||
| + | As I had my expanding foam ready to reinstall I was able to roll over the rear crease knowing that the edge would be hidden by the foam. | ||
| + | |||
| + | I left it to dry for several hours although to be honest you've probably only got 30 mins before any further adjustment is impossible. I am pleased with the result and I'd give it 9.5/10 as I have accomplished my mission with no saggy headlining. The 0.5 is just my opportunity for improvement along the window seal edges as these are noticeable if looking upwards with the door open... not a common activity as I'm sure you'll agree. | ||
| + | |||
| + | FYI the wavy 'stripe' is actually dashboard reflection. | ||
| + | |||
| + | {| class="wikitable" | ||
| + | |- | ||
| + | ! rowspan="2" | [[image:inside_roof_1.jpeg|400px]][[image:inside_roof_2.jpeg|400px]] | ||
| + | ! Inside | ||
| + | |- | ||
| + | | & across | ||
| + | |- | ||
| + | |} | ||
| + | |||
| + | {| class="wikitable" | ||
| + | |- | ||
| + | ! rowspan="2" | [[image:Expanded foam strip.jpeg|200px]] | ||
| + | ! | ||
| + | |- | ||
| + | | Expanded Foam Tape in position | ||
| + | |- | ||
| + | |} | ||
Latest revision as of 08:48, 21 September 2021
Background
So you have probably arrived here searching for a quick fix for your saggy headlining. I have good news and bad news for you.... bad news first, there is no quick fix.
Generally speaking the reason for your saggy headlining is that the face material has become detached from its foam backing. I first noticed this on my MY2010 S2 Exige when it was abut 7 years old.. it started in small patches but over the next few years it deteriorated to large clumps of sagginess, until eventually I thought how hard can this be? I'd watched youtube videos of people peeling back the capping pieces (US guy on Exige windscreen piece) and thought it looks relatively easy......
The Bad news.. its gonna be a long job... the good news is you can do it in stages.
CAVEAT: Your experience may be different. No guarantees are given.
Peeling back the lining
Now you may be luckier than me but annoyingly at the edges my headlining was really good which became a massive frustration. I tried plastic spatula tools and the sellotape technique but it wasn't really making progress. I had read that heating up the steadfast glue may soften it up a bit so I applied a little heat from a hairdryer but it wasn't making much impact, well not until I melted the nylon and created a hole in my headlining. This made the repair decision easy. I wasn't going to be able to.
Baldricks - I have to go all in!!!
So now my decision had been made, I could go at the headlining more aggressively. I wanted to retain it as some sort of template so I knew how far to stick the new material but I wasn't too worried about the backing. Brute force tugging peeled back strips of a few inches per tug but I was was eventually successful in bringing both the nylon and the foam together in nearly all cases. My research had shown images where the foam remained and you may then have to tackle that with a wire brish or something but in a way I was lucky...... perhaps this is a quality part from Lotus?
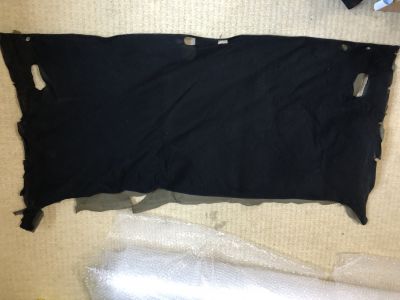 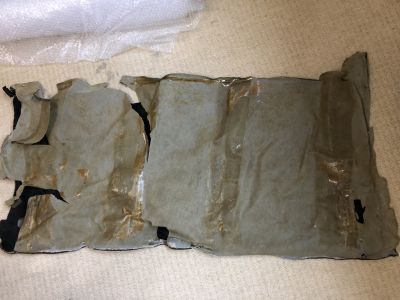
|
Face |
|---|---|
| & reverse |
Only the Factory contact adhesive to go
This was a trial or products, techniques and resourcefulness. I was worried about using a serious adhesive remover because of fumes but also because I was working on a plastic (apparently GRP) inner shell and I didn't want to melt it. So I tried a number of things with various degree of success.
Removing the sticky stuff (a.k.a. trials & tribulations)
1.Heat - still ineffective
2.Isopropyl - didn't make any impact
3.Wire scourer - some impact but at an aggressive loss of paint - not a massive impact as it was going to be re-covered, but not productive enough
4.Meguiars Mirror Glaze Ultra-Cut Compund and DAS-6 orbital - smelt nice but not effective
5.Meguiars Deep Crystal Paint Cleaner - not a smidge
6.Deepio Kitchen degreaser - now we're getting somewhere on the thicker patches where the factory had applied a good dollop to their brush before laying down. This with a thin bladed paint scraper was 50% effective and glue came off like you'd imagine copydex would (if you're too young to remember ask your dad). However where the Lotus factory guys choose to save a few more pence with areas of minimal coating, you couldn't get an edge to scrape up.
7.Autoglym Intensive Tar remover.
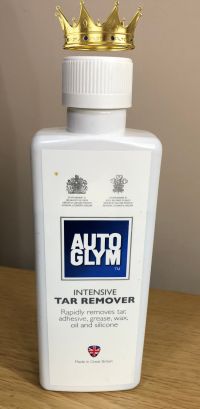
|
The undeniable King!
Autoglym Tar Remover |
|---|---|
| Hallelujah! |
As you may imagine I was backwards and forwards on the internet looking at what others had done, generally forums inundated with marine based tradesman and whilst thinking ahead to what glue to use on the next stage (more on that later) I visited a marine upholstelry supplier and saw the humble Autoglym product recommended as a glue remover. I had some, I tried it, and although not an easy job, for those thinner patches and to get in the nooks and crannies it was the best. I was using a microfibre towel the ones designed for glass with a tight ribbing to them and this combined with the autoglym product used as a penetrating solution mananged to get me all the way. I did have to pause overnight and get some more the following day from Halfords.
The end of the beginning
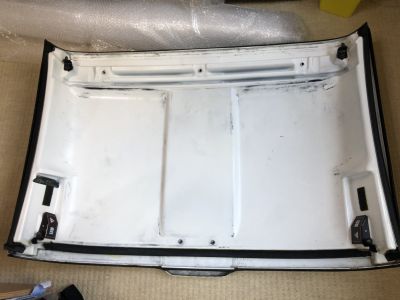
|
Hardtop with old glue removed |
|---|---|
| Clean as a whistle |
So with a clean roof I was able to continue using the car in its 'bare' headlining mode with no adverse side effects other than aesethtics. I am surethere are plenty of people that run this way, but in the process of removing the sticky stuff I did take off sone of my white (body colour) paint leaving black surface scratches so long term for me this is not the strategy, but as its my one and only daily I still need it to be driveable when the weather isn't right for topless (and for security).
The beginning of the end
I found a thread on Exiges.com where someone had sourced replacement lining from Martrim.co.uk. They had lots of options and I ordered some samples. I also contacted Eltech in Italy (who made my carbon fibre seats with heated pads :thumbsup) so I could match with those and possibly the door cards. I was on a roll, well right until Matt in Italy told me the price and that was before shipping. The samples from Martrim arrived and on closer inspection I realised they weren't a match and actually I could save myself a lot of effort if I could source something that was a perfect; i.e. I would not have to cover the front, side and rear cappings as well which are currently sag free.
Sticky stuff to Use
So based on recommendations I have ordered From Hawkes https://www.hawkehouse.co.uk/ in Gosport;
1. SAF111 - 1 litre
2. Trade Tack - 1 can
3. Brush for SAF111 application which I suspect to be disposable.
Headlining sources
My headlining (yours may be different) has a slighting ribbing to it and although black I only found 1 supplier in the UK online with any images suggesting similar.
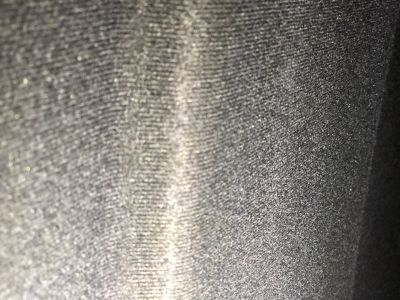
|
Factory Headlining |
|---|---|
| Subtle ribbing in factory cloth |
I found this place https://www.car-hood.co.uk/nylon-headlining (A jag specialist apparently) that had the only image which suggested a brush nylon foam backed headlining in black with ribbing. I ordered 2 metres even though (as measured) a 1 metre length of 150cm would be enough (for just the roof) but I wasn't sure which way the grain goes. Received the cloth within 48 hours and can confirm grain goes widthways so you could order a single metre for roof panel only. It's a perfect match to my eyes so very happy (Hopefully I'll have a metre spare if someone wants to make me an offer ;)
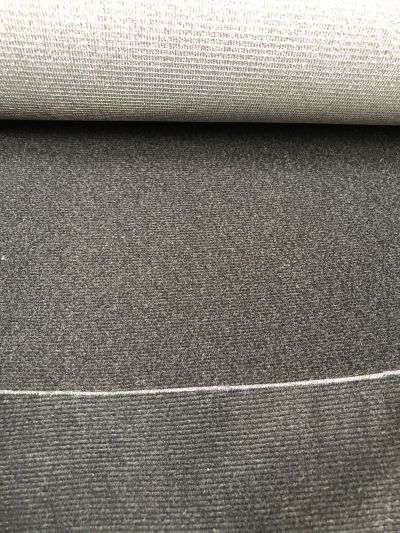
|
Comparing New with Old |
|---|---|
| New Reverse (top)
New Face (middle) Original Face (bottom) |
I could have ordered from factory (P/N: A120V6024V) as cost per metre was similar but it's difficult to know as a factory order (via deroure) how long that may take.
Optional replacements
And finally in the process of cleaning the roof I probably penetrated the glue holding on the rear foam strip (visible on inside of rood above as a black horizontal strip between the door pillar clamps) which prevents drafts and potentially water ingress. I found this product https://www.expandingfoamtape.co.uk/collections/6-15mm/products/expanding-foam-tape-20-6-15 which measures the right size expanded but is not really compressed in the Lotus apart from on the edges....
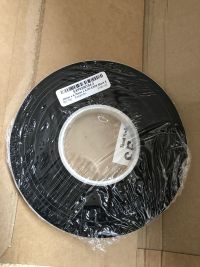
|
Expanding Foam Tape |
|---|---|
| Hoping it expands to 20mm! |
And the end result?
Well I took a bit of advice from the marine reupholsters and suppliers of the contact glue in NOT using a roller to smooth it out, as they suggested it made force the glue through the foam backing and onto the surface of the cloth face.
I started in the middle with the roof on its back, and aligned the ribbing width-ways. Whilst choosing a side to work on I tried to keep it taught but smooth from the inside out, focusing on concave/inside corners and creases until I reached the edge where the window glass rubber sits. I tried to get it as close as I could right around the edge.
I'm not sure how much extra effort it is but if I was to do this again I would remove the rubbers so the fabric could go behind rather than what I attempted which is a straight edge to butt up to the rubber seals.
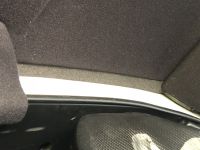
As I had my expanding foam ready to reinstall I was able to roll over the rear crease knowing that the edge would be hidden by the foam.
I left it to dry for several hours although to be honest you've probably only got 30 mins before any further adjustment is impossible. I am pleased with the result and I'd give it 9.5/10 as I have accomplished my mission with no saggy headlining. The 0.5 is just my opportunity for improvement along the window seal edges as these are noticeable if looking upwards with the door open... not a common activity as I'm sure you'll agree.
FYI the wavy 'stripe' is actually dashboard reflection.
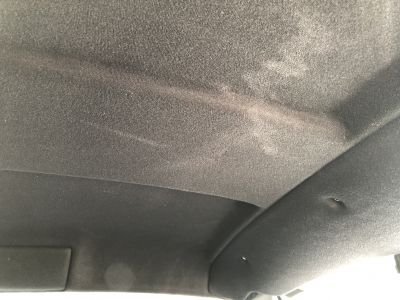 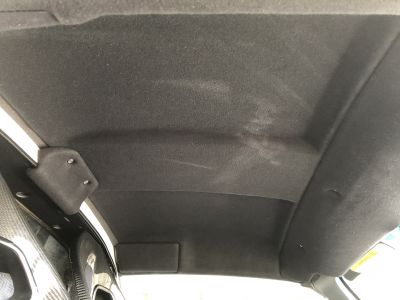
|
Inside |
|---|---|
| & across |
|
|
|---|---|
| Expanded Foam Tape in position |