Difference between revisions of "How to make a wiki page"
m |
m |
||
| Line 73: | Line 73: | ||
{{clr}} | {{clr}} | ||
| − | Once you have clicked on the red piece of | + | Once you have clicked on the red piece of code it will take you to a page like this: |
Revision as of 15:41, 29 March 2007
How to make a wiki page
Step one
Make sure the page you would like to make does not exist by checking the Techwiki for a key word of what you are going to make a page about, if the subject does not exist type in the name of the page you would like to make.
example:
Then you will have a page that looks like this:
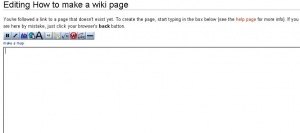
Just click on the red "create this page." to begin making your very own techwiki page, you will the have a page that looks like this:
Now here is where things get intresting, basicly just type in what you want to explane and add a tiny bit of 'code' that i am going to show you along the way. also if you want to start a new line you will have to leave a full blank line between the two lines to make a gap.
Saving your wiki page
Make sure you save your page now and then so you dont lose all your hard work, at the bottom of the page is a 'save page' button just click that BUT if you are only making a small edit please tick the 'minor edit' box (this helps not filling up the page historys log)
Warning:
If when you save you get a red error message saying you have not saved your page, just scroll down and click the save page button again, it just does this sometimes (dont ask my why)
Page Headers
To make a 'page header' you will need to use one of the following options:
Page Header
To do this put === before and after your header.
Page Header
To do this put == before and after your header.
Page Header
To do this put = before and after your header.
Bold
To make a word or text bold put three comma's before and after the word or text
To add a picture
To add a picture you first need to put the 'code' in:
image:image1.jpg
BUT with two brackes at both sides [[ ]]
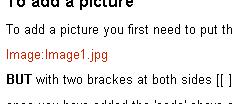
once you have added the 'code' above save your page. Then you can upload your picture to the techwiki buy clicking on the red piece of code where your image should be as shown:
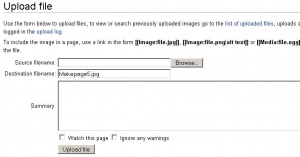
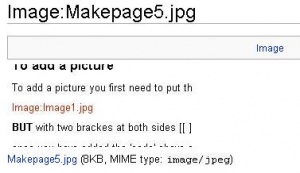
Once you have clicked on the red piece of code it will take you to a page like this:
Just click the 'browse' button and it will open up a standard windows search box, locate the picture you want to upload and click o.k, then click the 'upload file' button. you now should have uploaded you file with no problems and will be looking at the file uploading into the techwiki like so:
now when you go back to your page you will see the image on your wiki page.
Picture size options
here are the picture size options 'code' you will need to add to make the image look and fit in with your page the way you want:
remember above we showed you:
image:image1.jpg
now to make the image a 'thumb' sized image as show on this page you need to add
image:image1.jpg|thumb after
BUT still keeping the [[ ]] before and after.
now to make that thumb 'sit' on the left/center/right of your page add
image:image1.jpg|thumb|left after
and finnaly to add a small piece of text under your image just type it in after as shown:
image:image1.jpg|thumb|left|Click me to make larger
