Difference between revisions of "Jacking points"
m |
m (Added to Exige category.) |
||
| (12 intermediate revisions by 3 users not shown) | |||
| Line 1: | Line 1: | ||
| − | + | '''Take your time when jacking the car up, make sure you have the jack in the correct place.''' | |
| + | '''When placing the car onto axle stands be slow lowering the jack as the car needs to shift its weight.''' | ||
| − | + | =Elise= | |
| − | + | [[Image:Jacking.JPG|thumb|left]] | |
| + | {{clr}} | ||
| − | + | ==A== | |
[[Image:jacking points blue sticker.jpg|thumb|left|The blue stickers marks the place to jack at]] | [[Image:jacking points blue sticker.jpg|thumb|left|The blue stickers marks the place to jack at]] | ||
[[Image:jacking points side.jpg|thumb|left|Jacking Point A]] | [[Image:jacking points side.jpg|thumb|left|Jacking Point A]] | ||
| Line 13: | Line 15: | ||
'''A''' | '''A''' | ||
| + | |||
In the above image. Marks the single point per side jacking point, marked with a blue jacking point sticker on the underside of the car. This jacking point will allow you to raise both wheels on one side of the car at the same time. | In the above image. Marks the single point per side jacking point, marked with a blue jacking point sticker on the underside of the car. This jacking point will allow you to raise both wheels on one side of the car at the same time. | ||
| + | |||
{{clr}} | {{clr}} | ||
| − | + | ==B== | |
In the above image. Marks a jacking point that should be used when the car is raised on a 4 point lift, in conjunction with the C point (below) | In the above image. Marks a jacking point that should be used when the car is raised on a 4 point lift, in conjunction with the C point (below) | ||
| Line 26: | Line 30: | ||
[[Image:scrappingtonAxleStandsB.jpg|thumb|left]] | [[Image:scrappingtonAxleStandsB.jpg|thumb|left]] | ||
[[Image:B points.jpg|thumb|left|Note jack left inplace for extra protection]] | [[Image:B points.jpg|thumb|left|Note jack left inplace for extra protection]] | ||
| + | [[Image:Bpoints2.JPG|thumb|left|Close up of the picture on the left]] | ||
{{clr}} | {{clr}} | ||
| − | + | ==C== | |
Marks a jacking point, in the fuel tank bay shear panel, which should be used in conjunction with point B (above) when raising the car on a 4 point lift. This jacking point cannot be used without removing the undertray. | Marks a jacking point, in the fuel tank bay shear panel, which should be used in conjunction with point B (above) when raising the car on a 4 point lift. This jacking point cannot be used without removing the undertray. | ||
| − | + | ==D== | |
Marks a jacking point that may be user to raise the rear of the car. This jacking point cannot be used without removing the undertray. | Marks a jacking point that may be user to raise the rear of the car. This jacking point cannot be used without removing the undertray. | ||
| Line 37: | Line 42: | ||
{{clr}} | {{clr}} | ||
| − | + | http://gallery.seloc.org/albums/userpics/37655/Jacking-Point-D.JPG | |
| + | |||
| + | ==See also== | ||
| + | |||
| + | |||
| + | '''This can be used but preference should always be for the wheels to be raised on ramps or for jacking points B, C or D to be used.''' | ||
| + | |||
| + | |||
| + | The green arrow points to where I place axle stands - this means that the suspension and springs compress onto the bump stops and support the car. | ||
| + | |||
| + | |||
| + | The wishbones (red arrow) are not strong enough to support the car weight. | ||
| + | |||
| + | [[image:alxelstands.JPG|thumb|left|click to make bigger]] | ||
| + | {{clr}} | ||
| + | |||
| + | |||
| + | '''Some 'Jacking' Threads:''' | ||
| + | |||
| + | http://forums.seloc.org/viewthread.php?tid=115837 | ||
| + | |||
| + | http://forums.seloc.org/viewthread.php?tid=117273 | ||
* [[Jacking accidents]] | * [[Jacking accidents]] | ||
| + | |||
| + | =Evora= | ||
| + | |||
| + | [[File:Evora Jacking Points.PNG|thumb|left]] | ||
| + | |||
| + | '''A''' - Identified by a blue sticker. Beneath the front ends of the chassis main siderails, just behind the rear edge of the front undertray. | ||
| + | |||
| + | '''B''' - Identified by a blue sticker. Beneath each end of the fuel tank bay rear crossmember, just ahead of the front edge of the engine bay undertray. | ||
| + | |||
| + | [[Category:DIY]] | ||
| + | [[Category:Lotus Elise]] | ||
| + | [[Category:S1]] | ||
| + | [[Category:S2]] | ||
| + | [[Category:S2 Exige]] | ||
| + | [[Category:Lotus Evora]] | ||
Latest revision as of 14:14, 30 May 2013
Take your time when jacking the car up, make sure you have the jack in the correct place.
When placing the car onto axle stands be slow lowering the jack as the car needs to shift its weight.
Elise
A
A
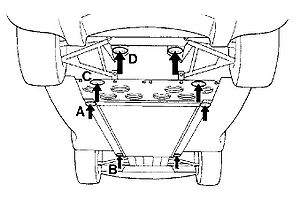
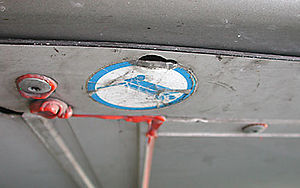
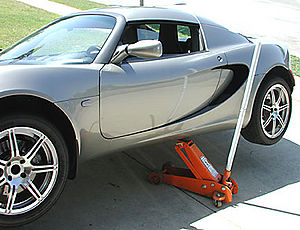
In the above image. Marks the single point per side jacking point, marked with a blue jacking point sticker on the underside of the car. This jacking point will allow you to raise both wheels on one side of the car at the same time.
B
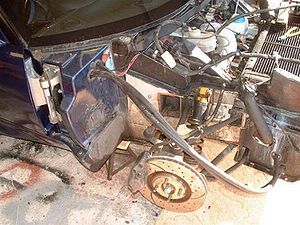
In the above image. Marks a jacking point that should be used when the car is raised on a 4 point lift, in conjunction with the C point (below)
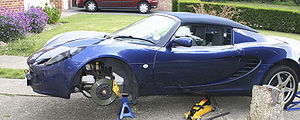
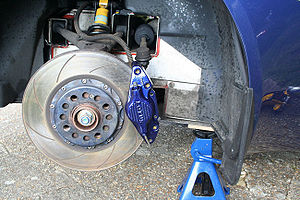
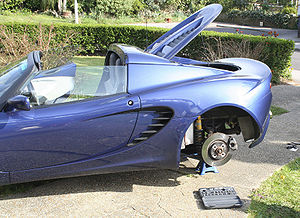
Both B points can be used together to support the front of the car when work requires both front wheels to be removed. This can be with conventional axle stands or more stably, two boxes (5 reams) of paper.
Axel stands on the b jacking points spread on wood you can see them under the wood
C
Marks a jacking point, in the fuel tank bay shear panel, which should be used in conjunction with point B (above) when raising the car on a 4 point lift. This jacking point cannot be used without removing the undertray.
D
Marks a jacking point that may be user to raise the rear of the car. This jacking point cannot be used without removing the undertray.
http://gallery.seloc.org/albums/userpics/37655/Jacking-Point-D.JPG
See also
This can be used but preference should always be for the wheels to be raised on ramps or for jacking points B, C or D to be used.
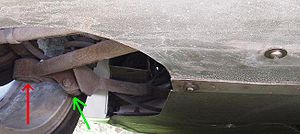
The green arrow points to where I place axle stands - this means that the suspension and springs compress onto the bump stops and support the car.
The wishbones (red arrow) are not strong enough to support the car weight.
Some 'Jacking' Threads:
http://forums.seloc.org/viewthread.php?tid=115837
http://forums.seloc.org/viewthread.php?tid=117273
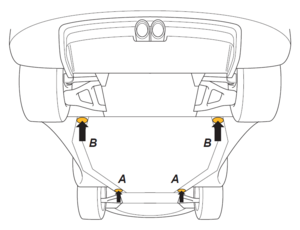
Evora
A - Identified by a blue sticker. Beneath the front ends of the chassis main siderails, just behind the rear edge of the front undertray.
B - Identified by a blue sticker. Beneath each end of the fuel tank bay rear crossmember, just ahead of the front edge of the engine bay undertray.
