Side window adjustment
S1 Side Window Adjustment
Had a go at adjusting my side window today, as both sides have been leaking water a little - not a massive problem as I rarely use the car in the rain, but enough to annoy me occasionally, particularly when I wash the car. The driver side window also wasn't particularly smooth when winding down, so I wanted to investigate this at the same time.
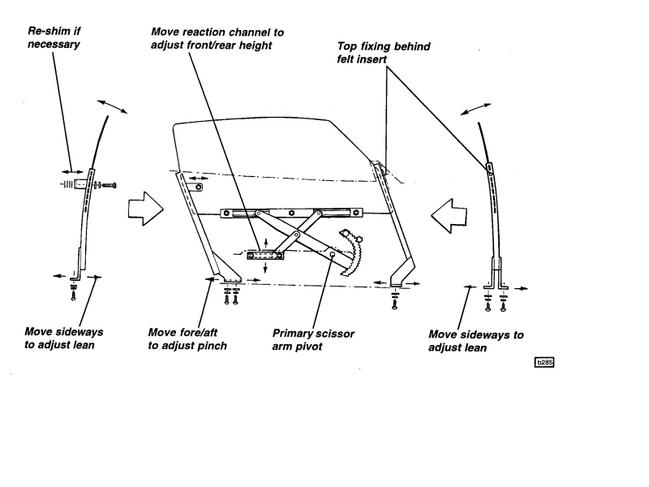
Being a mechanical pleb with just this diagram to work from I decided to create my own photo guide.
So I decided to have a go at creating my own photo guide. Apologies in advance for some of the photos - it was a little tricky holding 2kg of DSLR in one hand, a spanner in the other, the inspection light between my elbow and a knee and trying to line the shot up blind.
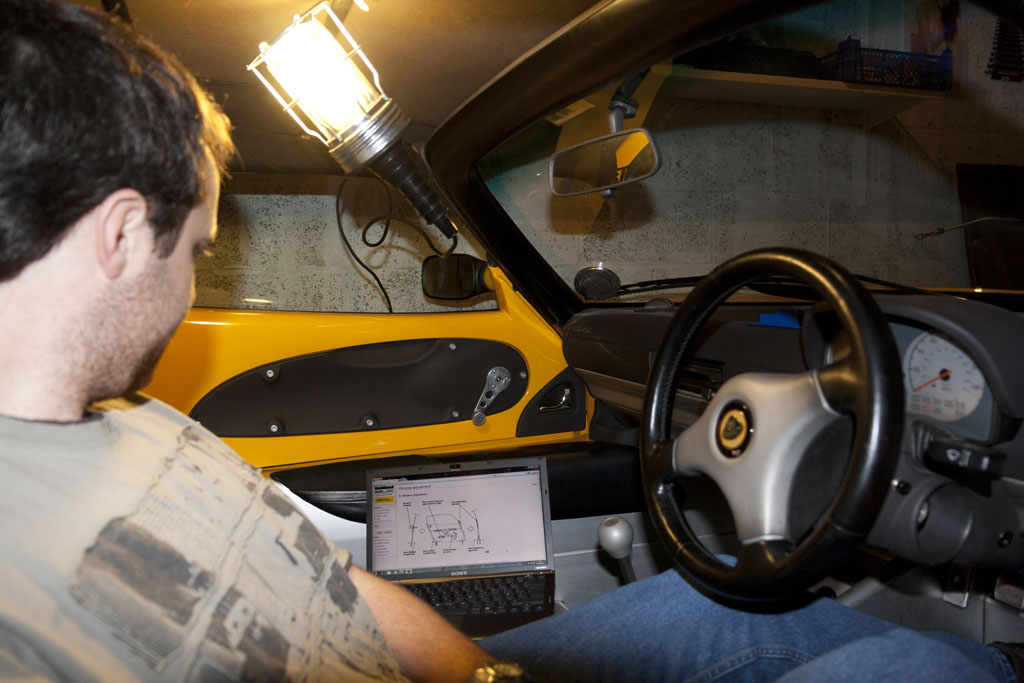
First things first get yourself set up in the car. I wanted to keep the roof fitted to the car to check the windows alignment as I went along, so hung my inspection light over the roof bar, and kept my laptop in the car for reference.
You'll also need the following tools:
- 2.5 and 5mm allen keys (for aftermarket winder handle)
- 8mm and 10mm spanners
- A #2 Pozidriv screwdriver (and a #2 Philips for the OEM scrivets)
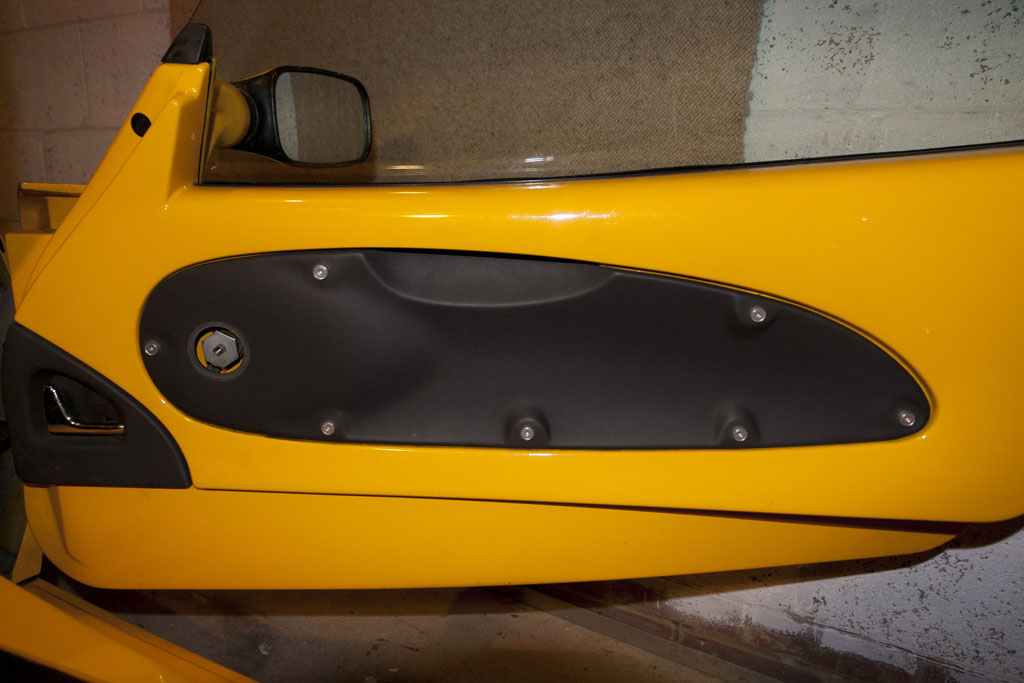
First job is to remove the window winder. This is simply held on by the M5 hex bolt in the centre (under a plastic cover in the original, easily removed via a small cutout on one side), so use an 8mm spanner. The bolt is in a recess so an offset ring or socket may be easiest, but a ring spanner a narrow pliers can be used in a pinch. Put this to one side as you'll want it in a moment.
Next up take the 2.5mm allen key and undo the 7 bolts holding in the door card (OEM, these are plastic scrivets, the closest common fit screwdriver is a Philips #2, but be gentle or you'll strip them). With these removed the door card should be easy to remove by pulling it down slightly to clear the top section from the door pull area, then towards you. Take care in case someone has stuck the inner door liner to the back of the door card.
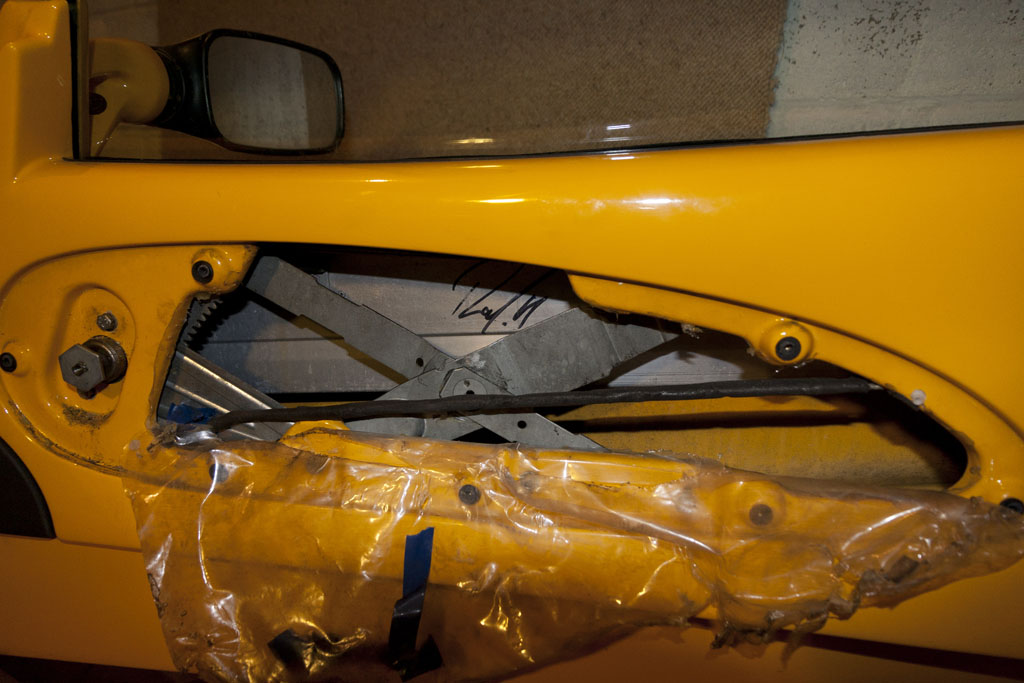
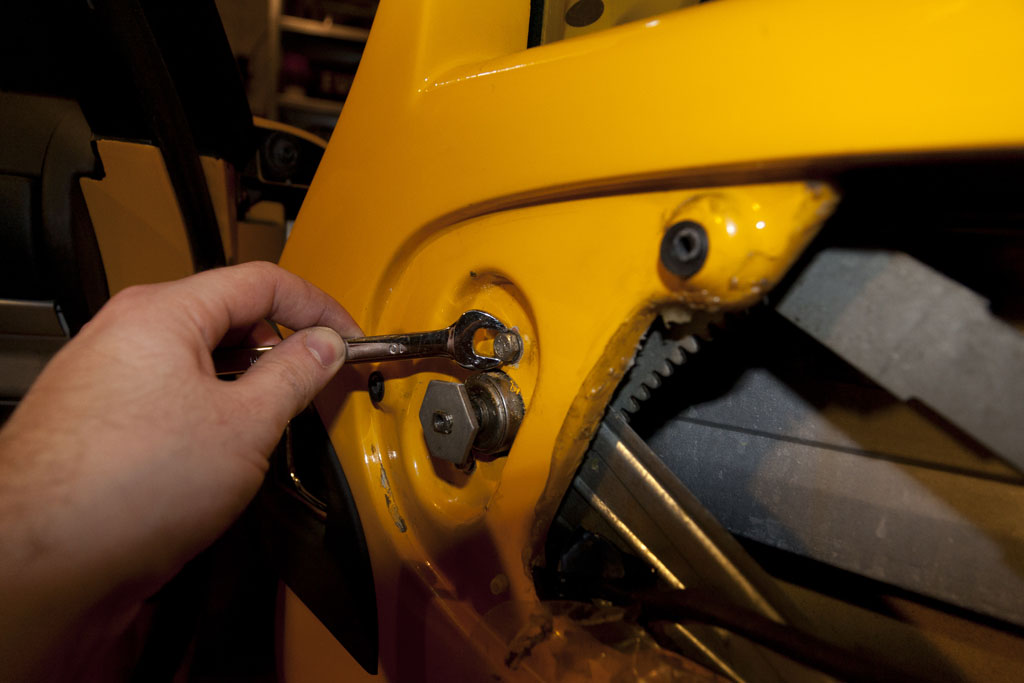
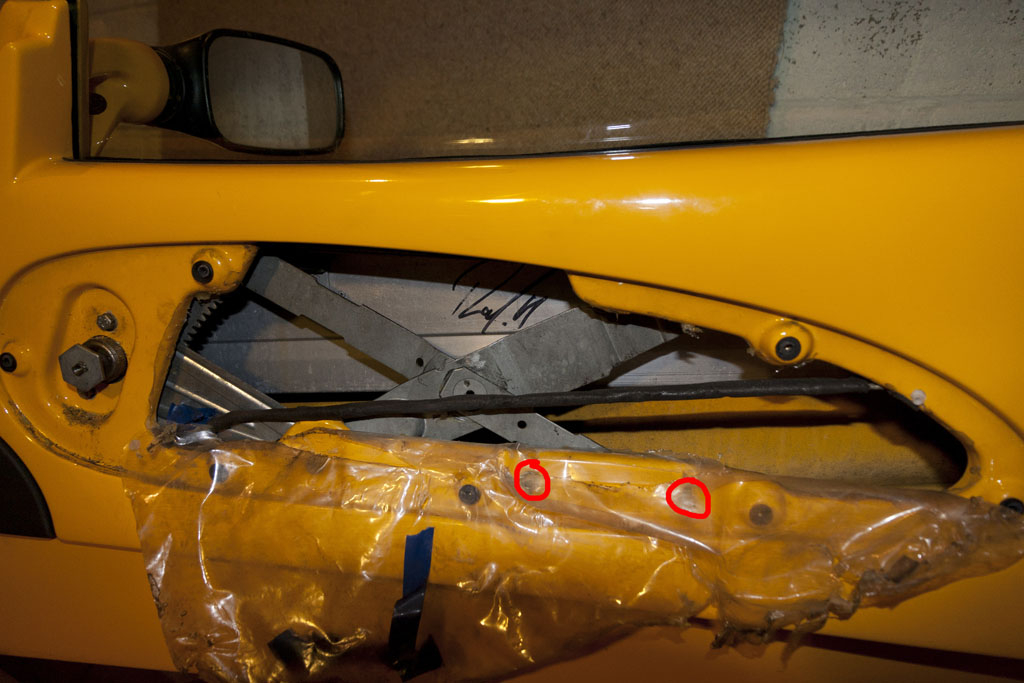
You now have access to the window mechanism inside the door. The first thing I would be checking at this point is the bolts behind the window winder, as in my car these were both a little loose. Tighten them up with the 10mm spanner. The latch actuator can also rattle or knock. It is the thick wire running horizontally across the car opening, probably covered with black foam as in the picture. It should be held by a white nylon clip at the front and back edge of the opening, if not it can contact the lift arm or door shell.
Now you'll most likely want to refit the window winder as you'll be moving the window up and down a few times.
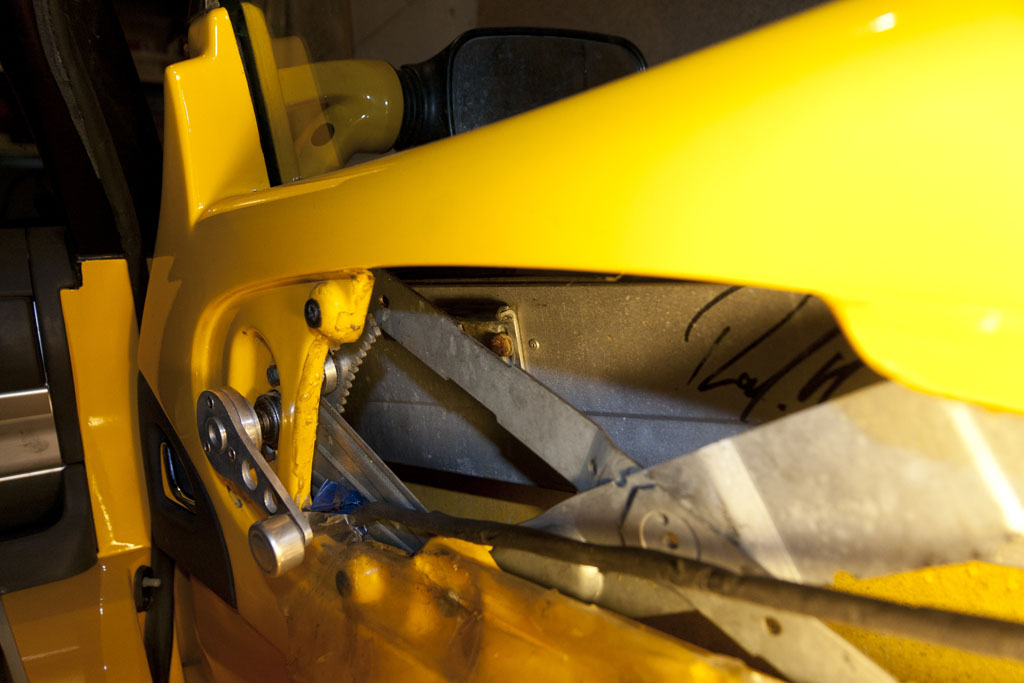
The first step I'd take is to locate the window stops and set them to the maximum height - this allows for the maximum amount of adjustment in other areas and then we can set them later. These brackets control the maximum height the window can go to, and on mine were set above the height the window could wind to - meaning if you grabbed the top of the glass when the window was closed you could pull it up another 5mm or so.
Wind the window into the closed position, so that the glass isn't blocking the brackets.
The front bracket will be hidden behind the one of the window arms.
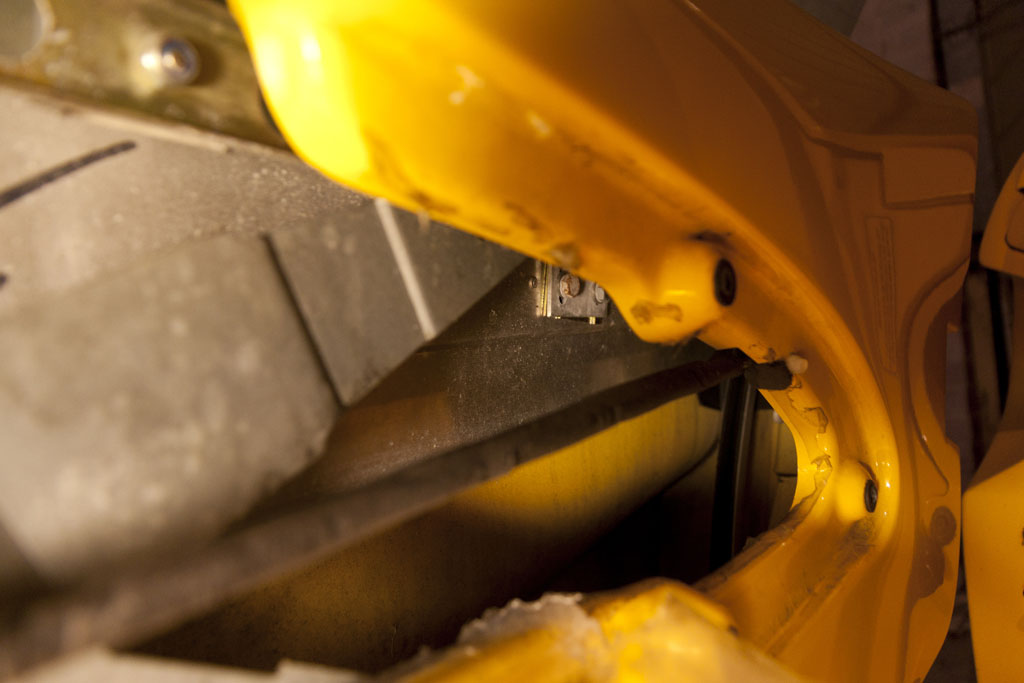
The other is a little harder to get to, hidden back towards the rear of the door and above the line of the door skin, so you'll likely be working more or less blind here.
Slacken off, but don't remove, all 4 bolts, and push the brackets upwards.
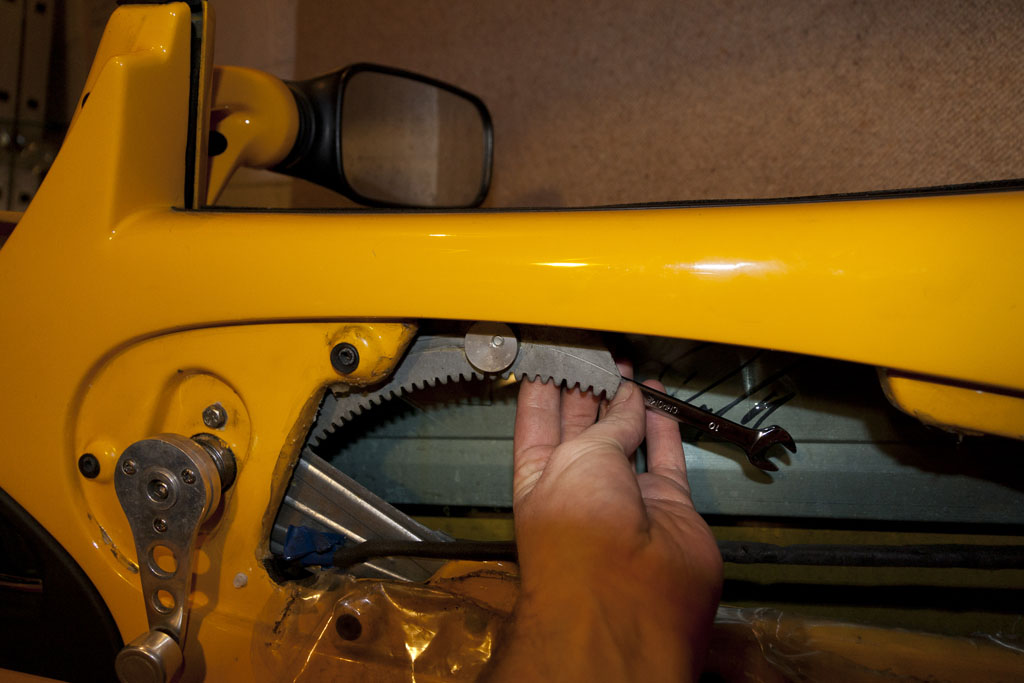
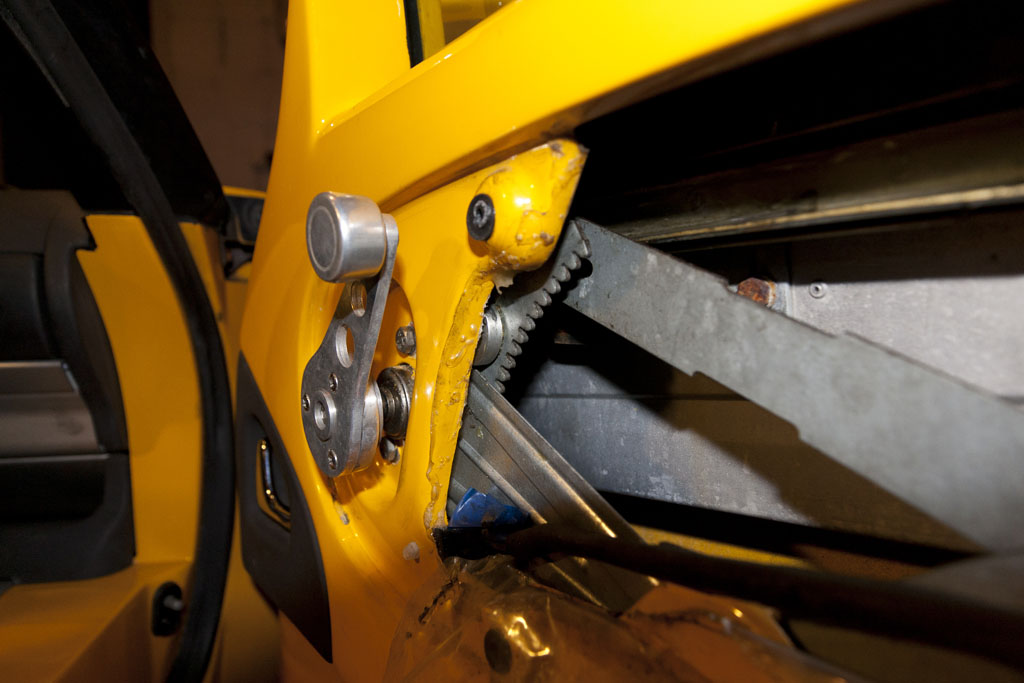
Next wind the window down, bringing round the toothed arc that operates the window mechanism. This has a small stop on it, which sets how far the mechanism can be turned. This has an off-centre bolt on the back which can be used to adjust its positioning, allowing for fine adjustment of how far the window can be closed.
This contacts against the inner metal beam when the window is closed, stopping it being raised any higher.
You'll want to adjust this until you have the height for the window set to the level it sits nicely against the edge of the roof along the cant rail, and meets the seals along the A and B pillars with as little in the way of gaps as possible. It shouldn't actually touch the cant rail, with the soft top removed, but sit within the shaped recess on the bottom outer edge of the rail. The shiny insert on the soft top will stretch across this recess and the window will press against that and form a seal without pushing on anything solid.
If you find the window is sitting high one end and low the other you can adjust the angle of the window slightly with the bolts marked on the diagram below - sorry I didn't take a good picture of these ones.
These can be loosened off with the 8mm spanner to adjust - if the front is high and the rear low the window will be angled back slightly, and vice versa. Adjusting these so the front was in the down position and the rear was up solved the window winder smoothness issue I had and gave the best fit against the roof. Be careful because too much tilt will cause the window not to cover the seal or even to foul on the B pillar.
- Just to be clear, the reaction channel doesn't need to be tilted, just raised or lowered. Raising the reaction channel (both bolts) will raise the back of the window, or alternatively lower the front. This allows you to set the window so it closes snugly along the whole of the roofline. If you do tilt the reaction channel, then the tilt of the window will be different when it is open or closed. The tilt when it is open doesn't matter so much but too much difference and the window won't slide smoothly. Generally you want the reaction channel more or less level. After altering this, you might need to adjust the side guide channels for the correct pinch.
At this point I then pulled the window stops (remember we slackened them off earlier?) down to the height of the window and tightened them up - this prevents the window from being pulled upwards when it is already closed. Note that the buffers may have shims so that they intercept the window cleanly depending in the lean adjustment - the wrong shims may mean the buffer can knock against the bracket or miss it completely.
For reference I also located the adjustments for the lean of the window and tried making a slight adjustment as my window seemed to move outwards a little when you shut the door, as if it was resting leaning a little too far in.
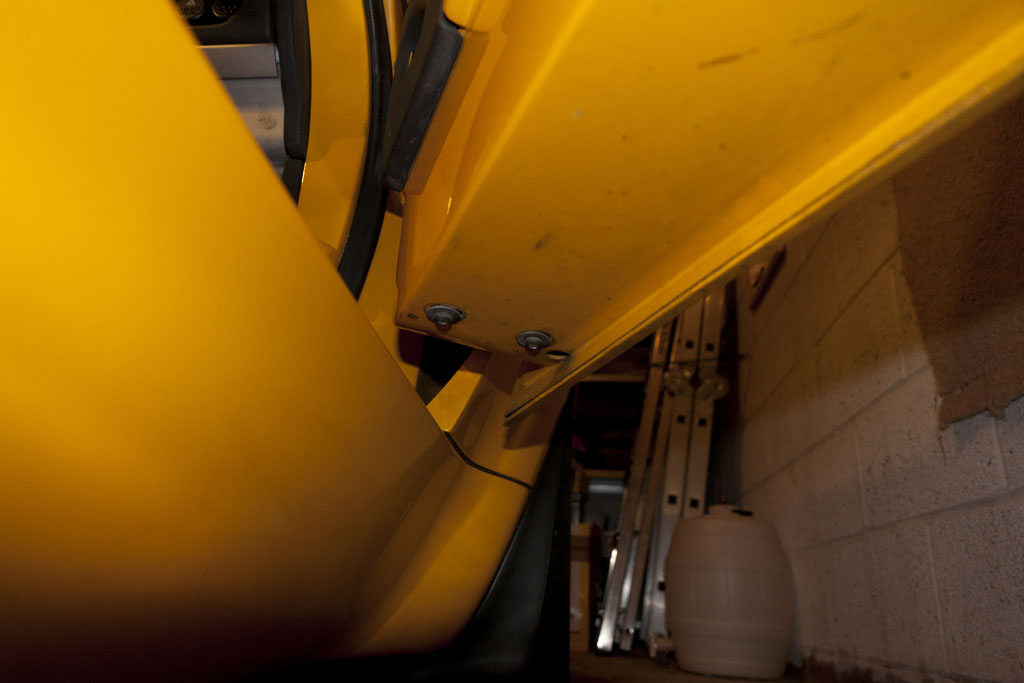
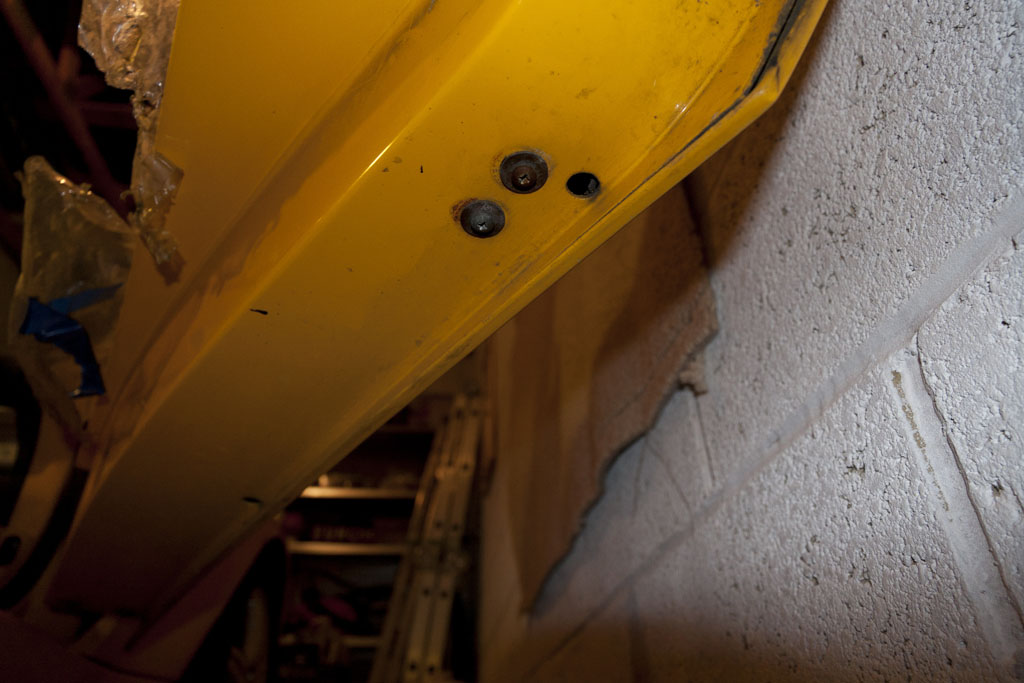
These are both on the underside of the door and use the Philips screwdriver - mine were a little corroded but giving them a quick soak in WD40 and using a fairly thick screwdriver made easy work of them. Use a Pozidriv #2 on these or you risk stripping them.
The first adjustment is at the front of the door, towards the hinge. These each have a bracket attached that runs either side of the glass and control the angle at which it leans in.
The second adjustment is at the other end of the door. These both attach to a single bracket that is located on the outside of the glass, towards the outer door skin. This controls the lean if moved side to side and the pinch if moved backwards and forwards.
I found both these quite hard to change as you have to push on the bolt to hold it in position at the same time as tightening it, but I seem to have taken a little bit of lean out of the window so it moves less now - might help if you are suffering from rattling windows? The lean should be adjusted so that there is some pressure on the window seals, but not too much. You don't want to push on the window too hard when the doors are closed or deform the seals too much. The front seal in particular forms a channel which is necessary to divert water down the A pillar so it doesn't seep inside. Too much or too little pressure on the window will also form a poor seal along the top against the soft top, or allow too much movement of the window over bumps.
Not a comprehensive guide by any means, but hopefully might at least help people visualise where the various adjusters are - any corrections or questions let me know and I'll do my best to update this or answer them.
