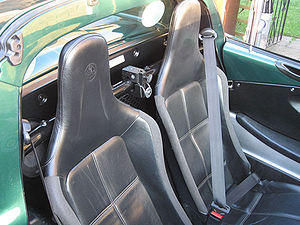
Harness bar
A harness bar is required to fit behind the seats of the Elise, and secured to the rollover bar, before harnesses can be fitted.
There are various manufactourers of harness bars but they fall into two main categories. Those that require the plastic trim behind the seats to be partially cut and those that don't. There are also various bolt patterns which should be chosen depending upon what type of seat you have.
Require cutting
Spyder
Spyder made harness bars for both the S1 and S2.
Plug and play
Sinclaire
aparrently sell a harness bar that can be fitted without the cutting of the plastic trim.
Sinclaire's harness bar fits to top set belt anchor bolts.
Elise S1 and VX220 Plug and Play, Elise S2 require cutting
www.elise-shop.com
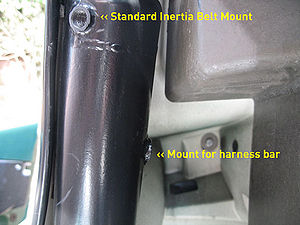
The Elise S1 and VX220 harness bars will fit in the car without any cutting. These harness bars do require the seats to be taken out at installation. The Elise S1 harness bar is mounted on the original (welded) nuts on the backside of the roll-over hoop. This means the harness bar will be fully supported by the roll-over hoop at an impact.
The Elise S2 harness bar is mounted in the same way and therefore require some cutting of the plastic part behind the seats. The cuts to be made are the size of the harness bar diameter. If cut carefully and kept aside, the bits that came out can be welded back in using thinner.
S2 Instructions
Tools
- Permanent marker pen
- Small Philips screwdriver
- 13mm Socket
- 13mm Ratchet Spanner
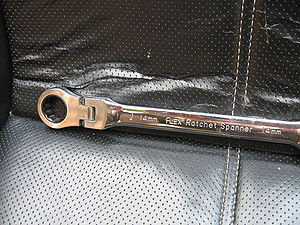
- 14mm Ratchet Spanner
- 5mm Allen Key
- 6mm Allen Key
- 6mm Ball Head Allen key a socket
- Minimum of a 12″ long bar to extend your socket
- Dremel tool to cut away plastic
- 12″ bladed hacksaw to cut foam
First things first – this is a long and frustrating job. Make sure you have the time and freedom to work it through – and have some elastoplasts to hand for the inevitable cut fingers / skinned knuckles. Most of the bolts you are touching in this task will be torqued to a set amount – and be very tight if they haven’t moved in a number of years. Be VERY careful not to break, cross-thread or damage the fixings. If it all goes wrong, these are only fixings keeping you attached inside your car ! To repair the fixings / mount points is very expensive.
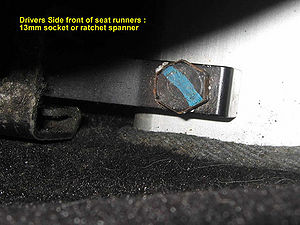
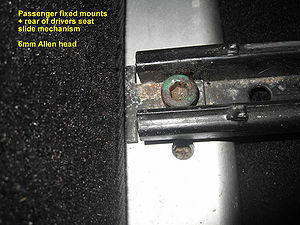
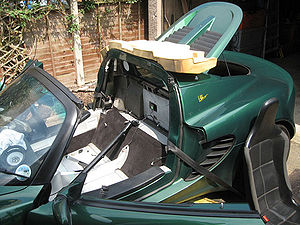
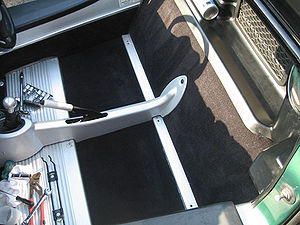
Use a 13mm socket or spanner to remove the front of the drivers seat sliding mount. Use a 6mm Ball head allen key to remove the rear fixings. Lifting the seat carefully as not to scratch or damage any of the interior you can now remove the seat and place it on the floor next to the car.
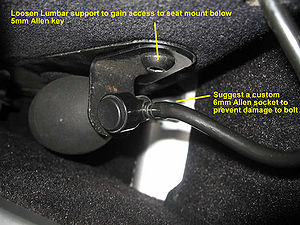
Removing the passenger side is a little more complicated. Remove the front bolts with a 6mm Allen key. However, the doorside rear bolt is completely hidden and inaccessible. Use a 5mm allen key to loosen the bolt holding the lumbar support. This should allow you turn the mount anti clockwise and tuck the ‘bulb’ behind the seat granting you access to the seat mount below. However the bolt is still fairly inaccessible.
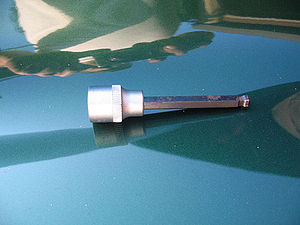
The best tool for the job is to obtain or make an 6mm Ball Head Allen key socket with at least a couple of inches reach. These tend to be an expensive and difficult item to find, so I ended up cutting up a set of ball headed allen keys and mounted them into a cheap set of ‘normal’ allen sockets – having first removed the previous hex shapes. With this tool on the end of a long bar, you can easily remove the rear seat mounts without risking damage to the fixing or mount. Once you’ve removed both rear fixings, remove the seat carefully and sit it next to the car.
Next remove the speakers – you’re on your own with this one as it will depend what was in the parts bin when Lotus was putting your car together. It is usually a case of prising off the front grill with your finger tips and then undoing the 4 philips screws that hold the speaker in place. Don’t forget to detach the cables.
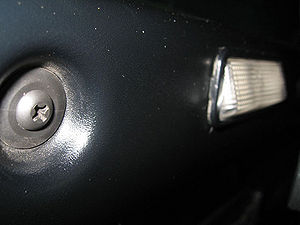
With the speakers off, it’s time to remove the plastic trim. Undo the four plastic screw / rawl plugs at the top of the trim. Try and save them, as they’re expensive from Lotus ( 75p each !!! ). With them removed, it’s a case of gently pulling the trim out. When it starts to come away, reach behind and disconnect the interior light. It should come away very cleanly. Behind the plastic trim there is a single piece of foam sound proofing. You need to remove this carefully – as it will tear and I promise it will be in at least two pieces before you have your car back together again. If it does try and tear in two – try to keep the tear to one side and not through the cut away for the alarm sensor.
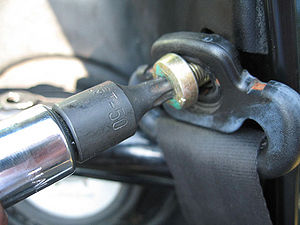
Undo the seat belt shoulder mount with a Torx T-50 socket – making sure you don’t loose the metal load spreader sleeve from inside the mount. Congratulations – everything is now out. Wasn’t that quick ? Yeah, but now the fun starts. First of all, you want to test fit your harness bar. One to make sure it does actually fit – and two to ease the bolts for when you are fitting them later on. Fix in the bar into the car using the supplied bolts and a 14mm ratchet spanner. It’s fairly easy to fit without the foam rubber or the plastic trim in place.
With the bar fitted in place, use a permanent marker pen to mark where it sits against the roll bar. You’ll need this as a reference point when attaching the bar for good later on. Without it, you could spend hours guess the location of the bar – so make sure it’s accurate. Take the bar back out -and now refit the foam rubber.
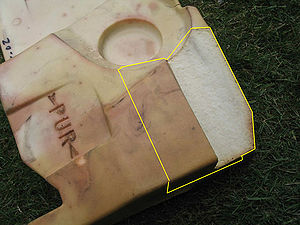
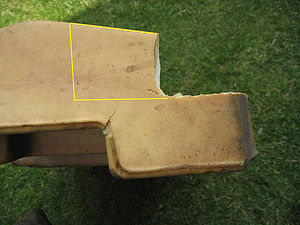
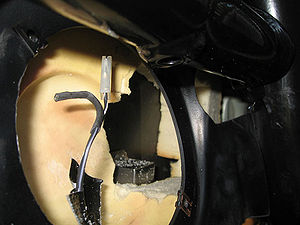
With the foam rubber roughly in place, mark the height of the harness bar onto the foam rubber. You’re going to have to cut away enough foam to allow for the bar to be fitted – plus enough foam so that you can get a hand/arm through the speaker pod to tighten up the bolt on the harness bar. In the photos I’ve marked roughly how much material needs to be cut away on the passenger side. Keep the foam you remove, as you can fit it back later on. When cutting, the foam disintegrates into dust – so take the necessary precautions not to inhale it, or to let it get everywhere. Refit the foam to the car.
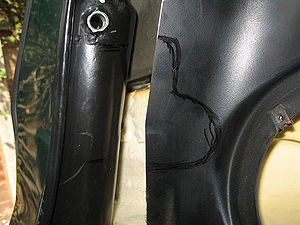
Next up it’s cutting the expensive trim. Hold up the trim against roll bar and you should be able to see how much you need to cut away for the bar itself. You will need to cut extra material away under the bar to allow you to manipulate it into place. I’ve a PDF file of the Template I made that you can use – but it will depend on the bar you have purchased. Mark up the trim and then very carefully cut away the plastic with a dremel tool. Try to ensure the edges are square without any sharp lips, as it will pay dividends later on.
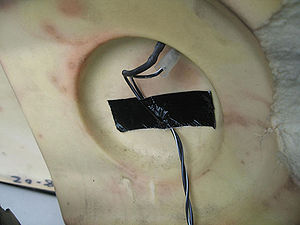
With the plastic trim cut to shape, it’s time to put it back in the car. Before doing so, I recommend gaffer taping your speaker wires and interior light wire in place, as fishing behind the trim to retrieve them at a later date isn’t recommended. Slide the trim back in carefully and make sure it all clips into place. Don’t attach the interior light or replace the four rawl trim bolts jut yet.
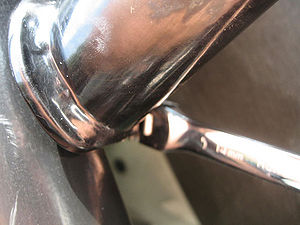
Carefully slide your harness bar into place. Use the speaker pods as access to the rear of the bar ( which you can now reach as you’ve cut away all that foam ! ) Reaching behind you should be able to get the bolt to go through into the thread into the roll bar. This is exceptionally fiddle, frustrating, knuckle scraping. Hold the bar up to the pen marks you made earlier and at least the bar will be at the correct height – but you’re still going to be guessing and fiddling to get the horizontal position correctly. Apply elastoplasts, beer and sympathy from a loved one until you have these bolts fitted. Once one is in place, make sure it is turned in well before starting the second bolt – as moving the bar back on forth on the other side will easily undo a partially tightened bolt. Once both are in place, tighten well with the 14mm ratchet spanner – which can usually get the best access from under the bar via the hole you have already made in the trim. I would seriously suggest to reserve two hours for just doing up these two bolts.
Once in place, it’s a matter of putting things back into the car. Fix back the 4 rawl trim bolts and re-attach the interior light. Re attach the top seat belt shoulder mounting. Re attach the speakers – but you’ll find you can actually only get 3 of the 4 screws back in, as the harness bar prevents access to get the final screw in. Before refitting the seats, it’s worthwhile giving everything a clean, as this is the last time you’ll have easy access.
Normally before refitting the seats you would actually fit some harnesses. I’m omitting this from my guide – as at the moment I don’t have the seats with the correct cut outs for my harnesses. Assume that before refitting the seats you attach your harnesses to the mount points before moving on…
Refitting the seats is just the reverse process of taking them out – again with emphasis on not damaging any of the fixings or mount points.
Lotus Europa S/SE
VX220 harness bar - extending mounting holes
The VX220 harness bar from Elise Parts can be fitted but the mounting holes on the bar need to be extended. This bar clears the standard speakers ok and no trim cutting is required. Back On Track have successfully fitted one of these to a Europa S.

