Light Switches (Elise/Exige S1)
This page should contain info pulled from forum threads around S1 light switches. It is very much a work in progress at present.
Source
These switches are found in Peugeot 205s and 106s with the same cover. However neither car uses them for head/side lights (see cross compatibility for options). The same design switch mechanism also appears to have been uses on the 306 with a different cover design. Apparently they were made by TRW (whoever that may be), but there may be multiple suppliers as there were two cover clip designs.
Removal
Do not be tempted to pull at the switches in the car. This will remove the cover from the switch but not switch body from the car.
Removal procedure
- Take off both* plastic dash trims (one for the light switches and the other surrounds the heater controls) off by squeezing together till you can extract one edge. Be careful though as the upper lip of the insert can scratch at the senotex paint on the top dash panel and reuin it. Use something like a credit card or anything that is thin and plastic to protect the paint). * May be possible without removing heater insert.
- Unscrew the two philips screws that hold the dash top to the aluminium switch plate, followed by the two philips screws that hold the aluminium switch plate to the lower aluminium dash.
- Loosen the STACK, a hinged and ratcheted spanner may help or long extension bars (careful not to scratch the steering wheel cowl). You ONLY need to loosen the stack off sufficient to be able to wiggle off the aluminium dash top off.
- Once you have all that off, the switches can be seen in full, don’t be tempted to just pull on the cap of the switch as all you’ll be doing if you’re luck is pull of the cap leaving the full switch still in position and if not so lucky, you’ll have snapped off the lugs holding the cap on the switch
- To remove a switch disconnect the female plug (the harness is only just long enough to reach the location of each switch).
- From behind squeeze the switch body clips that hold the switch body into the aluminium switch plate and extract.
An alternatively method is to completely remove the steering wheel cowl, stack, plastic trim covers. This takes longer but gives more access and less chance of damaging trim.
Replacement Switches
New (and even used) headlight switches rarely come up for sale. Hazard, fog and heated rear screen are a lot more common as these were the ones used by Peugeot. Fortunately the two common switches can be used as substitutes for the less common variants by swapping the icons (see below).
Sidelight == Headlight == Hazard
Fog == Heated screen
Swapping Icons
Swapping the icon is really easy, they appear just to be clipped in. There are two ways to swap.
The whole black front with icon can be swapped however there are two clip designs. (need pic of two clips types)
The other way is just swapping the icon. This bit appears to have the same design on both front types. The icon is only clipped in so it is simple to push out (from behind) and then push into the new switch.
Changing the switch tell tail blub
The bulb is an LED. TBC this can be changed from the rear of the assembled switch. In the centre is a torpedo shaped peg. Removal should be a case of pulling on this.
(need pic of rear of switch)
Correct Order
From steering wheel out;
- Side light switch
- Head light switch
- Fog light switch
- Hazard lights switch
- Spare dummy switch
Switch Schematics
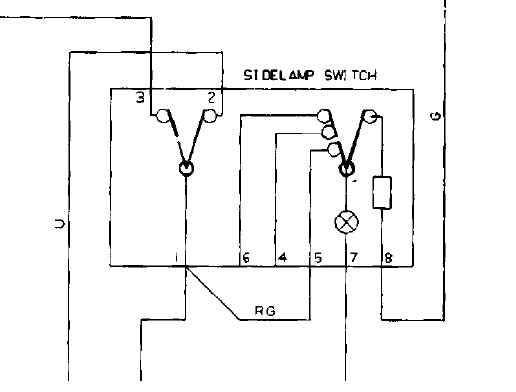
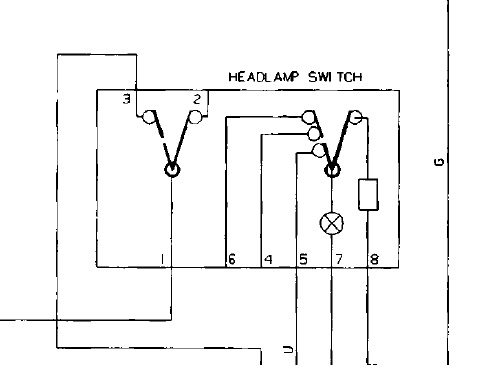
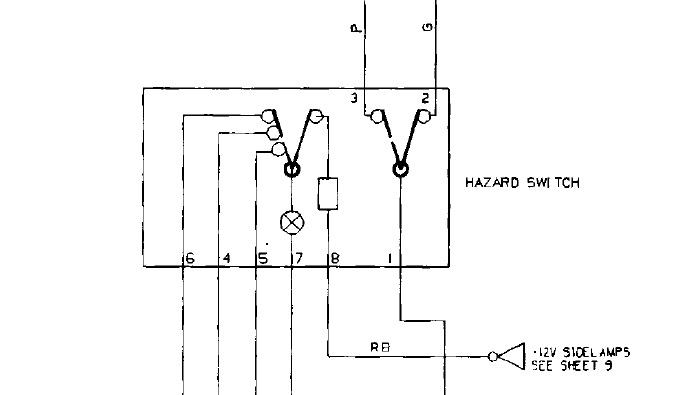
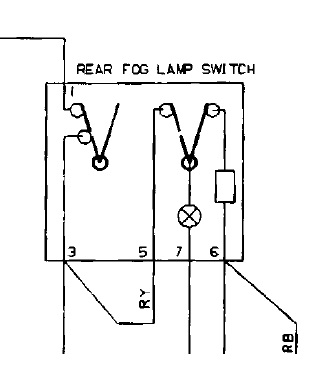
From the schematics, headlight, sidelight and hazard switch are the same internally, fog is different. The hazard schematic is drawn back to front but the connections are the same.
Interchangeable
Sidelight == Headlight == Hazard
Fog == Heated screen
Peugeot part numbers
These are from from a 205N
- 6553 20 : rear fog light
- 6553 21 : hazard flasher (some hazards are red, some black, I believe this number to be the black version based on a purchased brand new part)
- 6553 22 : rear window heating (demister)
- 6553 24 : fog lights
- 6553 25 : refridgerating (?) AC cooling
- 6553 38 : heating seat
- 6553 39 : heating pump
https://arc.seloc.org/viewthread.php?tid=345477 https://arc.seloc.org/viewthread.php?tid=374720
eBay search link that has produced good matches in the past; https://www.ebay.co.uk/sch/i.html?_from=R40&_nkw=peugeot+205+106+switch&_sacat=0&LH_TitleDesc=1&LH_PrefLoc=3&rt=nc&LH_ItemCondition=4
Useful Videos
Here are a few videos by Stefan3 showing disassembly/testing of switches.


